
I hope your Easter is filled with Spring joy and chocolate, even if you don’t celebrate Easter! I designed the quilt above in 2020, when I was working on… Christmas quilts! And I don’t think I showed you this design yet.
XXX Annika

I hope your Easter is filled with Spring joy and chocolate, even if you don’t celebrate Easter! I designed the quilt above in 2020, when I was working on… Christmas quilts! And I don’t think I showed you this design yet.
XXX Annika
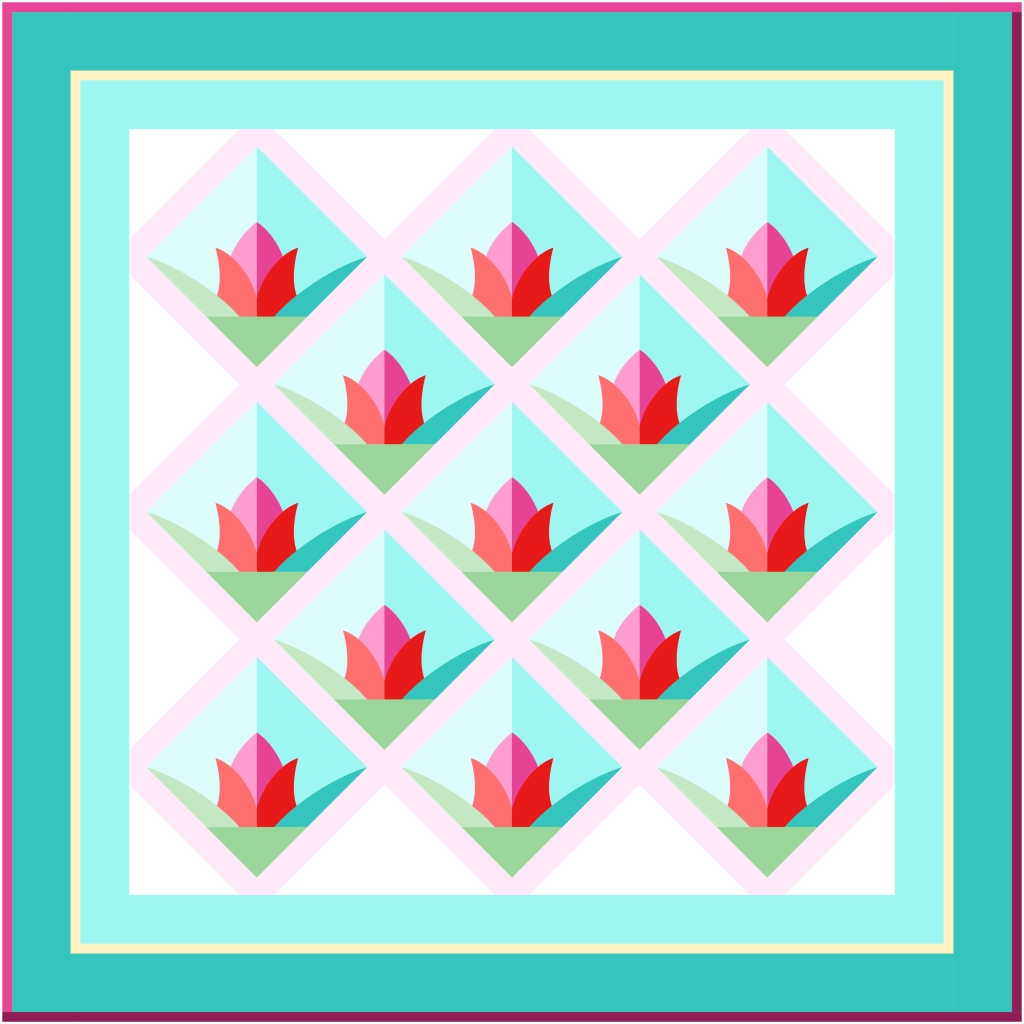
Linda Franz released a new Inklingo shape collection, perfect for Spring! It is the classic Tulip Patch. In my quilt designs, it may look like appliqué, but it is entirely pieced!
I traced a picture of the block in EQ8, to play with quilt designs. My EQ block is not entirely symmetrical, so it isn’t accurate, but good enough for design purposes.
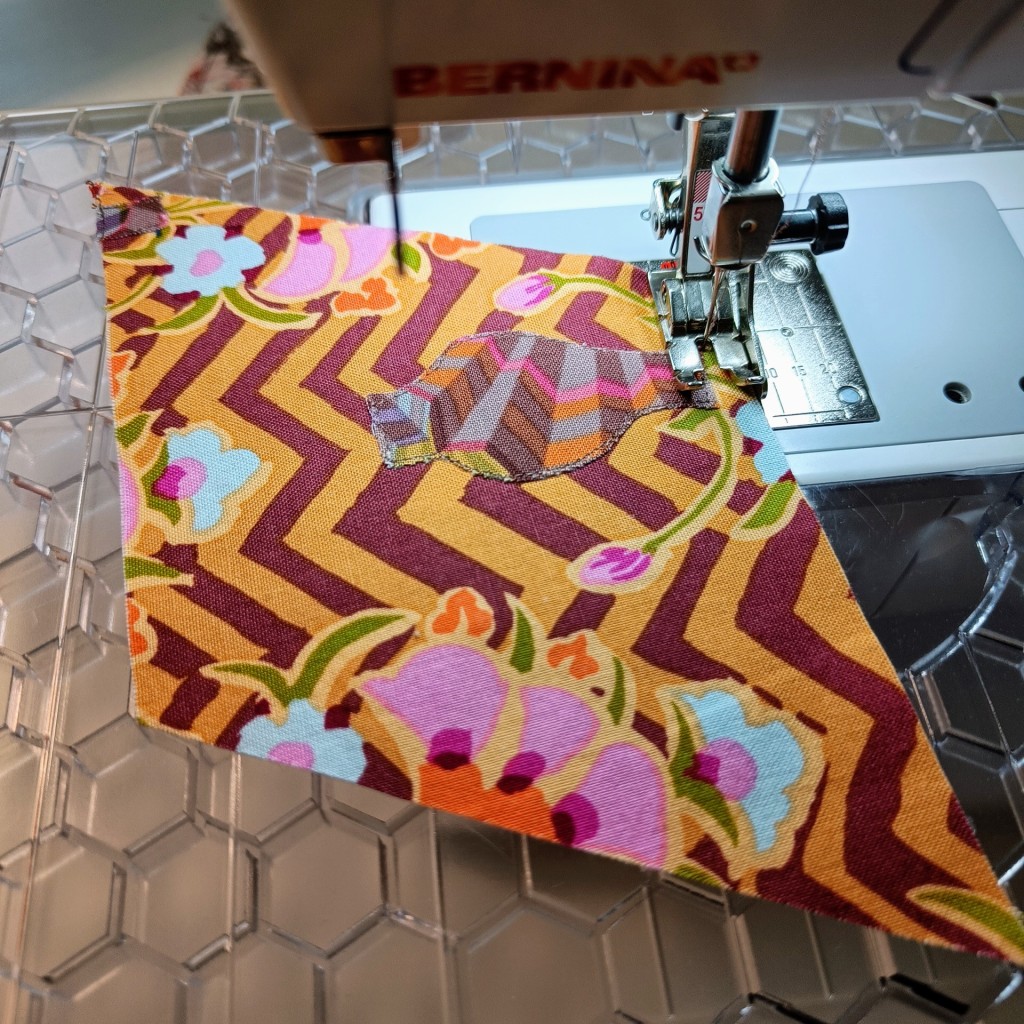
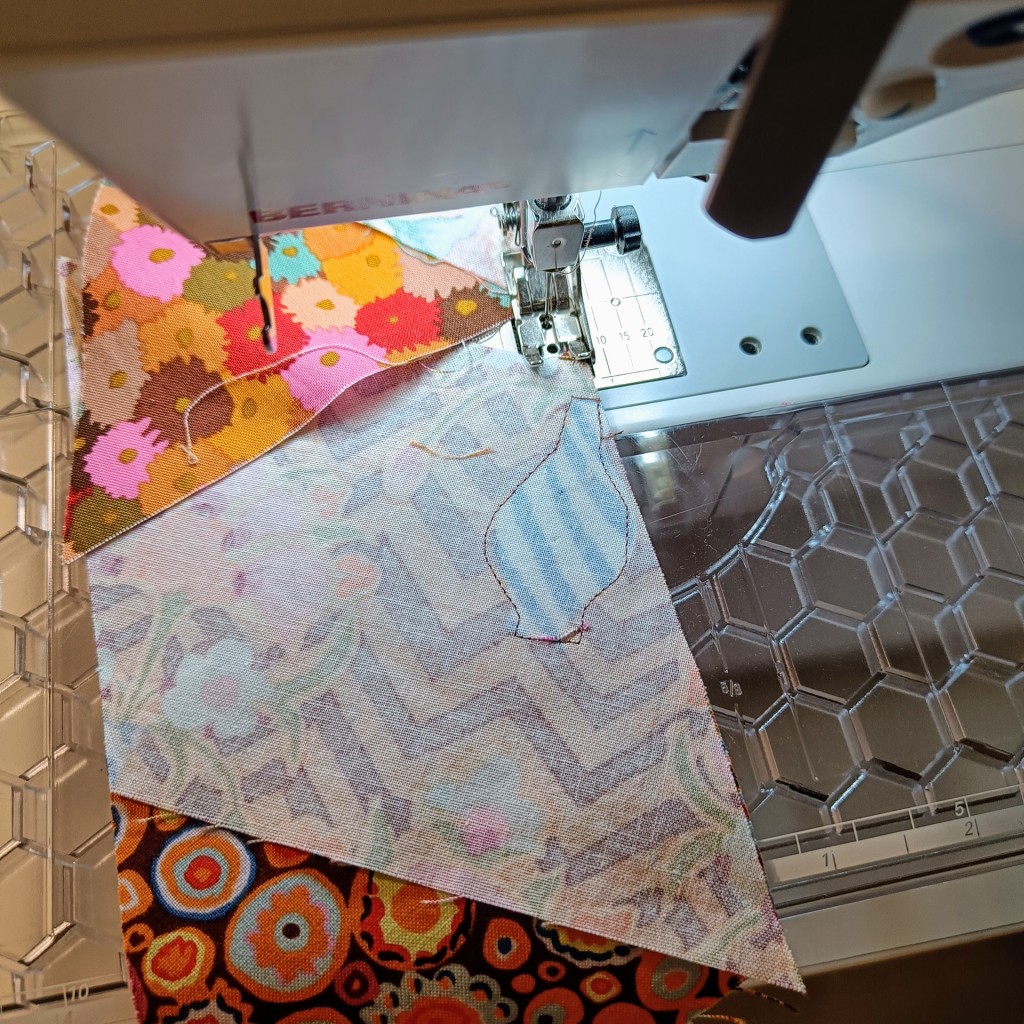
It’s a very nice block for hand piecing or hybrid piecing (meaning, I would not want to piece the inset seams by machine). Linda has provided a great illustration of the piecing order in the shape collection, and proved machine piecing this block is absolutely doable, even for a 12-year old beginner! Well, I am in awe of this young man!
I hope to inspire you with some pretty pictures of quilt designs with this block. I took a liberty and drafted a variation block, too. Can you spot what I added in the picture below?
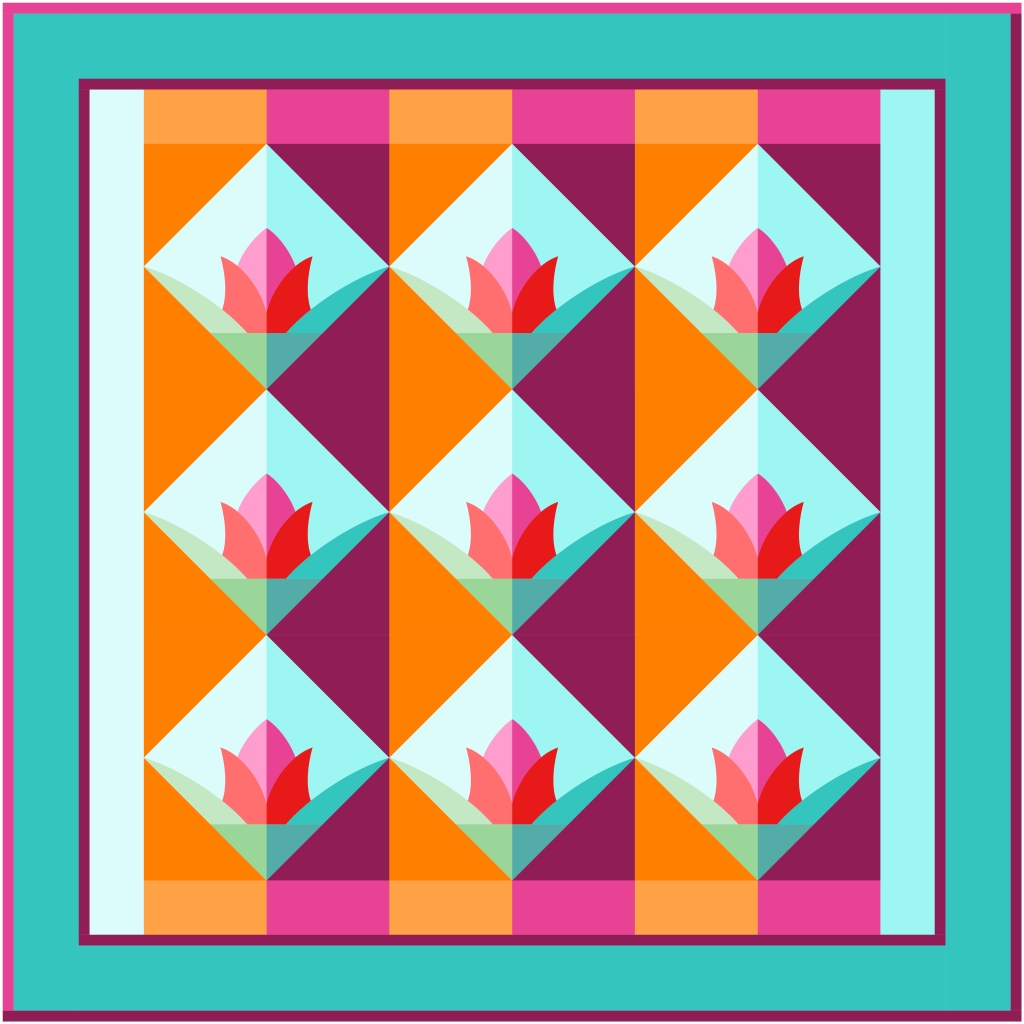
From a coloring point of view (not the piecing point of view), it made sense to me to add a seam line in the ‘bottom triangle’. It allows for transparency effects, and playing with light and dark. Now, these half triangles F are not actually in the shape collection. Looking at a picture of the 8 inch [20,3 cm.] block, I am guessing triangle F is about a 3.75 inch half square triangle (HST). To split it and still have straight of grain on the outside, you would need two 3.75 inch quarter square triangles (QST’s.)
In the index of Inklingo shapes I found several Inklingo shape collections with 3.73 inch QST’s. Depending on the accuracy of my estimated size, it could be usable (or it could be too small).
The next bigger size QST available as Inklingo shape is 4.24 inch. That really is too big, but you could always use them if ‘necessary’. Just piece them together, line up the center seams with the rest of the pieced block, and trim the outside of the block afterwards.

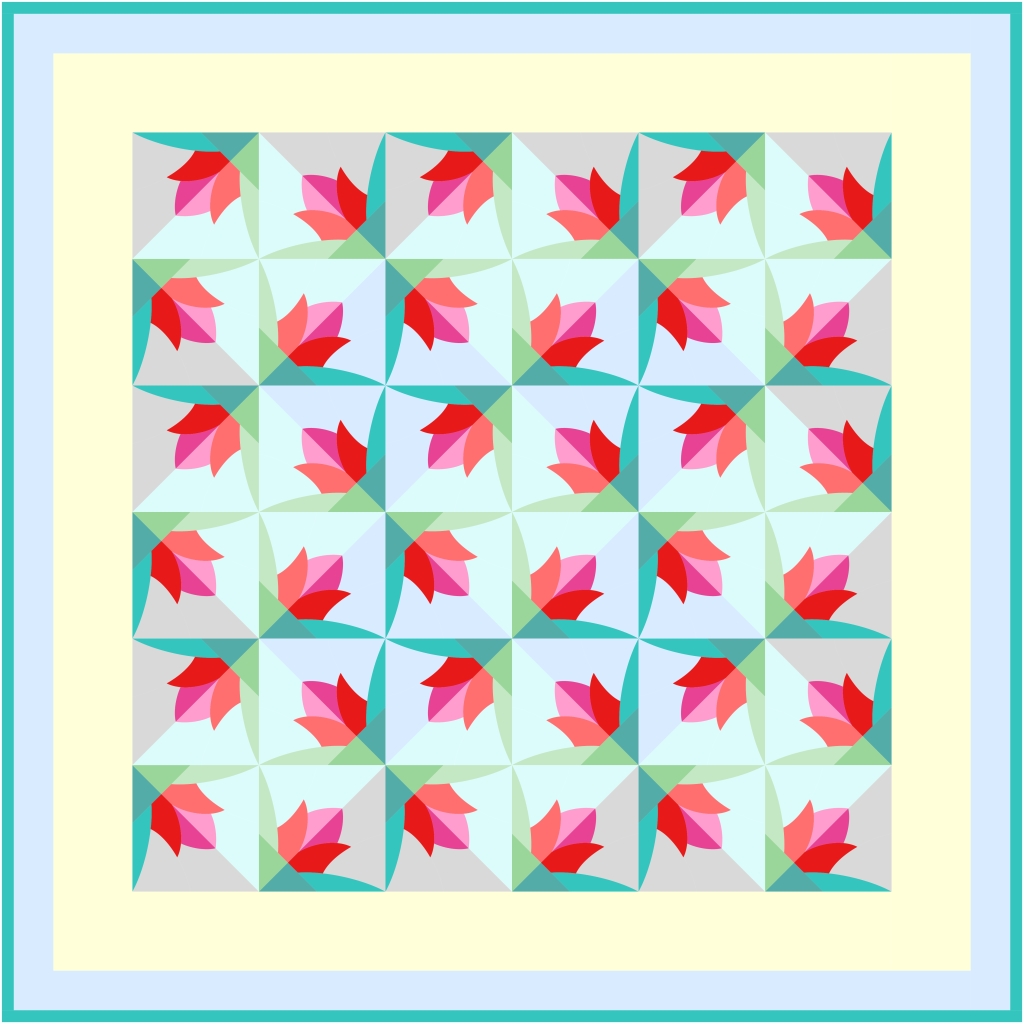
Well, I hope this put you in the mood for sewing Spring Quilts! The shape collection has a special introductory price until 28 of March 2024.
And Linda is even offering a flash sale of her wonderful book ‘Winding Ways – Quilting the Inklingo Way’, for both the download and the hard copy version. It is a great resource for every quilter, and especially with the Tulip Patch shape collection. The book has great tips and includes sewing instructions for piecing curves.
XXX Annika
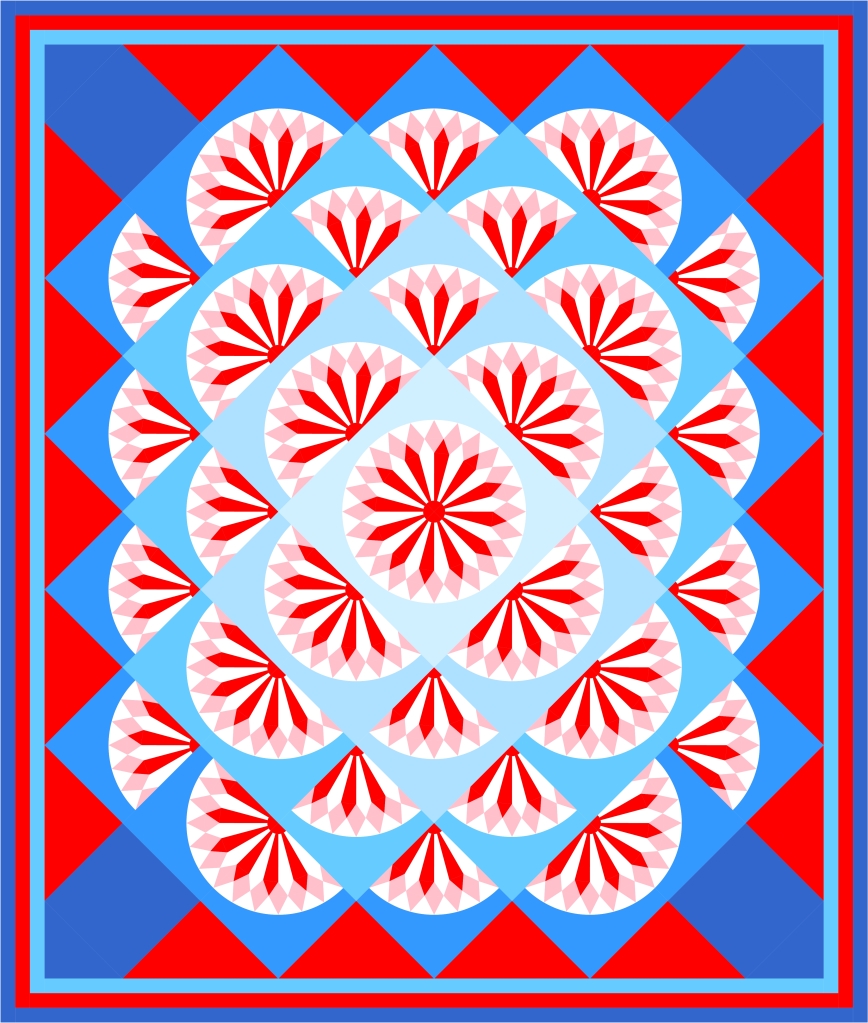
Inklingo (Linda Franz) has issued a new Inklingo Shape collection for another one of Willyne Hammerstein’s fabulous Millefiori quilts! It’s Night And Day, from the book Millefiori Quilts 5.
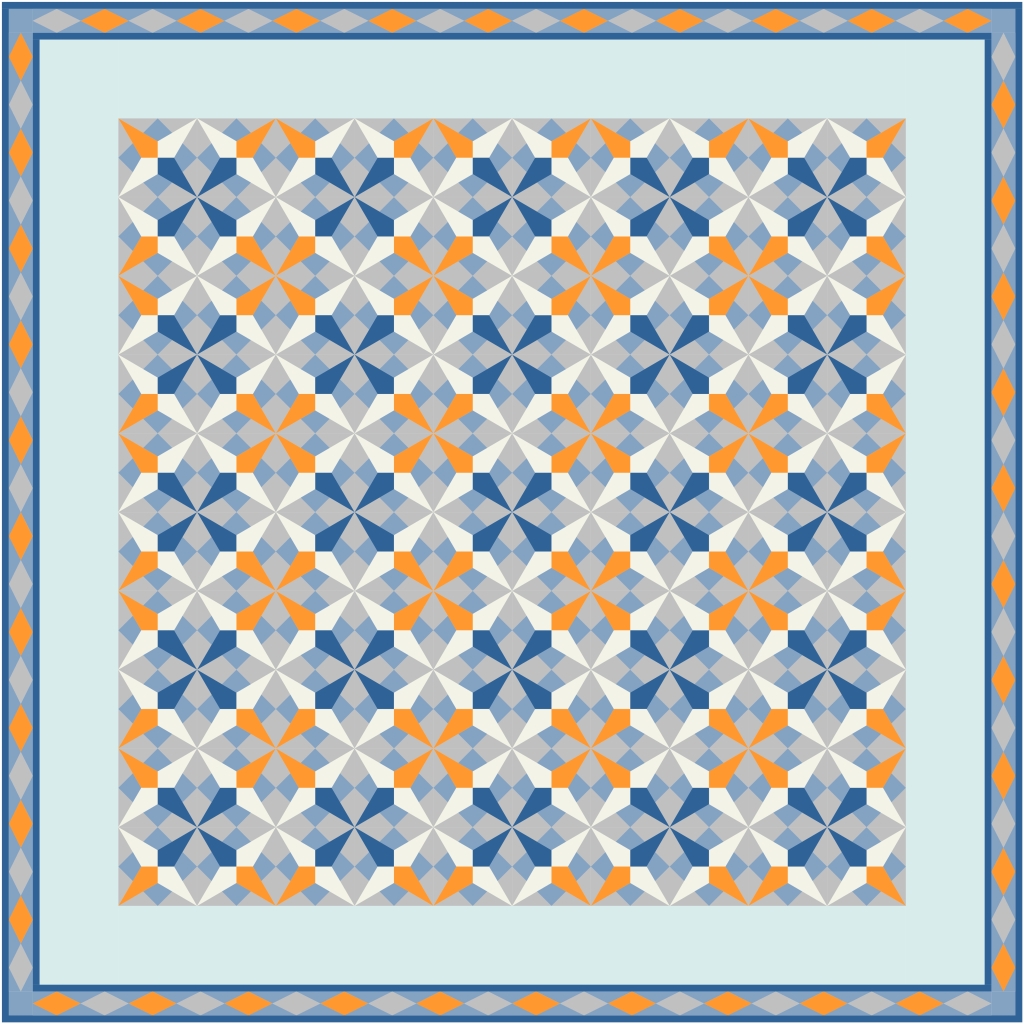
I was very excited when I saw this collection this morning, because it is one I can play with in EQ! Most of Willyne Hammerstein’s designs are tessellations on a non-square grid. And that is very difficult to recreate in EQ.

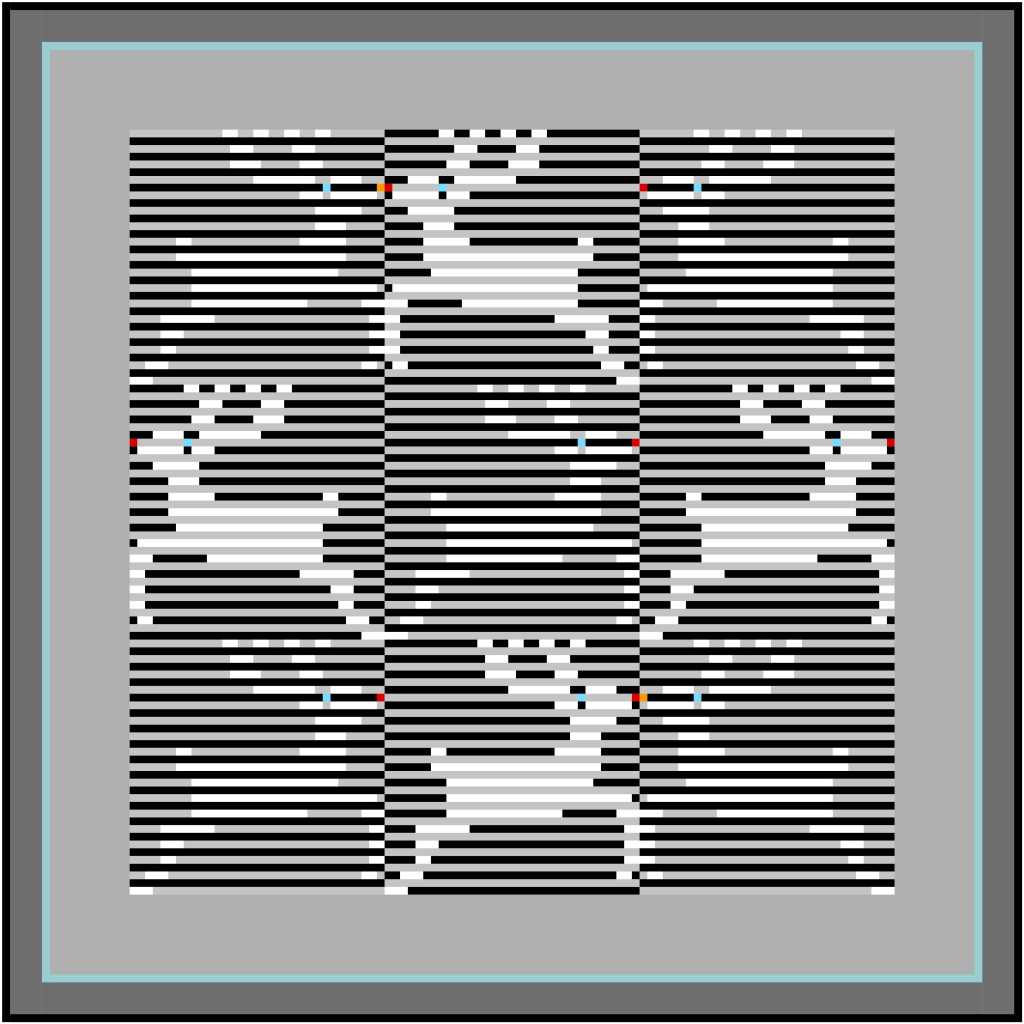
So, in EQ I imported an image from the Shape Collection of the page with shapes without seam allowances on my Drawing Worktable. I cropped it to a square that would repeat to recreate an image of the original tessellating design. After fiddling around a bit with the number of snaps, I was able to trace the image to draft a usable block for design purposes.
It isn’t actually accurate, because it has seam lines around the edges where I only drafted half shapes to get a square block. But, it’s good enough to create a color variation quilt design with a very different effect than Willyne Hammerstein’s fussy cut original quilt. Instead of four pointed stars, I created carrots and rettich by moonlight! :-)
The border is just an ‘instant’ diamonds border from EQ that I thought looked good. I was too lazy to calculate for something precisely Inklingoable.
I hope this inspires you to see even more fabulous possibilities with this new shape collection (and your Millefiori Quilts 5 book). You can get the Inklingo shapes for a special reduced introduction price until Sunday February 25 Midnight!
XXX Annika
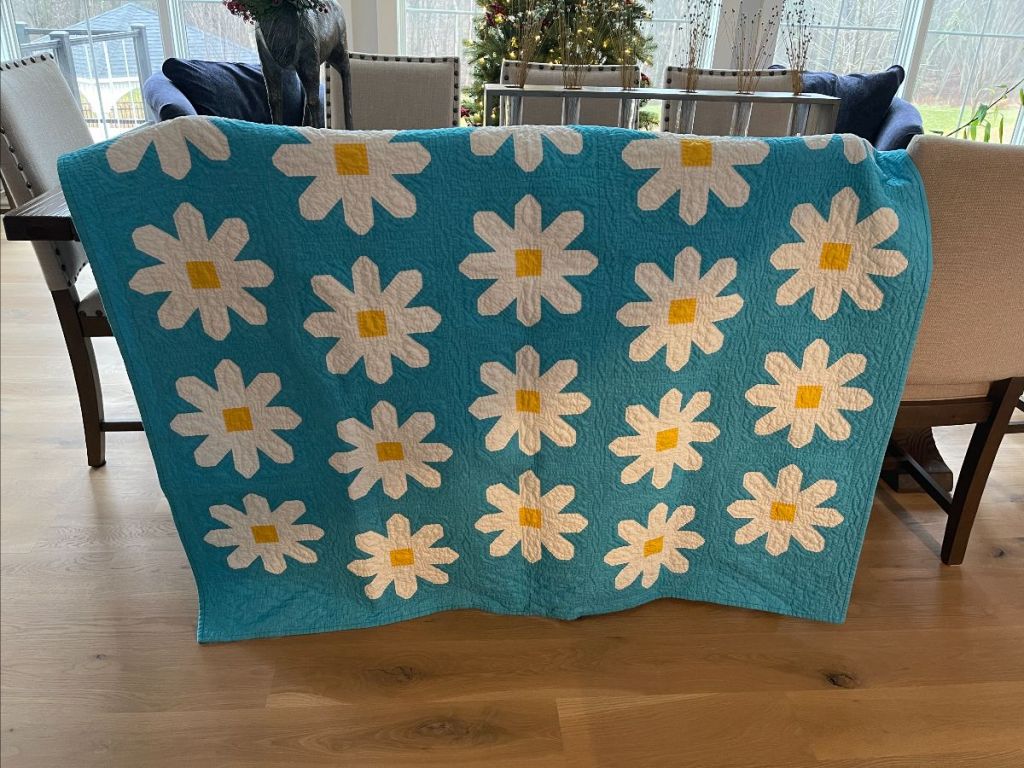
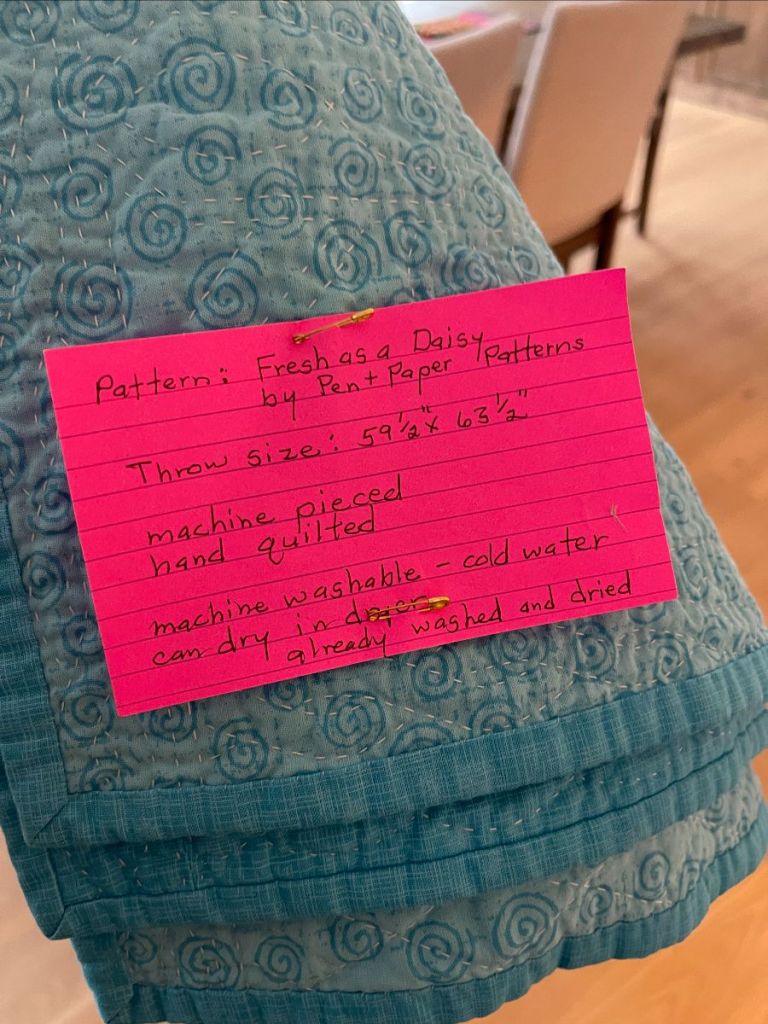
I’ve been meaning to share with you a list of some of my favorite (Indie) authors and resources for free reading. And today is the day, because one of my favorite authors, Lucy Score, sent a newsletter with a gorgeous quilt in it. Her mother made it for Lucy to donate to a good cause. I love the hand quilted large white and yellow daisies on a bright turquoise blue ground!
This quilt is auctioned off for a library. To find out more and to place a bid, click here.
I like to read (e)books, many of which are romance novels and cozy mysteries. And I really like discovering new authors for free. So I’ve got a few tips in the realm of romantic comedy and light mysteries, a couple of witches and some magic thrown in, and preferably with lots of cocktails, tea and baked goods. Small towns are good, big cities are fine, exotic beach locations are wonderful.
There’s not too much of it in my tips, but body positivity, neurodiverse characters, queer characters, older characters and ethnically diverse casts get bonus points from me!
Don’t expect tips for anything angsty, dark, kinky or with gore. I don’t like stereotypical dynamics where females are the victims, and males the heroes or just plain assholes with which the main female character happens to fall in lust with. I also can’t stand authors who put ugly guys on their covers, or models who look nothing like the main character(s).
If you are a reader too, you are probably familiar with libraries and subscriptions like Kindle Unlimited or Kobo Plus. Older books, (of which US copyright has expired) can be found in several places online, like the Project Gutenberg site. I don’t do BookTok or podcasts at all, so there may be great resources there, too.
I get most of my free books or amazing sales through author’s and online bookclubs’ newsletters.
Just today, I downloaded 30 or so cozy mysteries through https://cozymysterybookclub.com/bookblast/ (supposedly 25 January only, but sometimes these offers last longer, or, also happens, aren’t actually free on the day or in your location.)
Romancebookworms.com has ‘Stuff Your eReader Days’. You can sign up for alerts, but your favorite authors may also mention these in their newsletters.
Many independent authors feature freebies by friends in their newsletters, so if you start with signing up for one or two newsletters, this could snowball into a whole list of new favorite authors and free ebooks.
I am too lazy now to include links or sort them alphabetically, or by genre, or even include them all, but here comes a list of (mostly independent) authors whose books I really enjoyed and like to read more of.
Surprisingly, not all authors write good newsletters. There are many that are so boring and badly written that I unsubscribe very quickly. My favorite author’s newsletters are by:
Other favorite authors in romance, paranormal romance, paranormal and cozy mysteries:
Happy bidding and reading! XXX Annika

So, I wrote in my previous post I had a job interview. I mentioned to a friend that ever since the pandemic I had probably forgotten how to use makeup. I needed to practice before the job interview! She encouraged me, saying it was probably just like riding a bike. I thought it was a really odd comparison, but I’d check that anyway ;-).
Well, after in depth research, I reported to her why the two are not much alike at all. Since it made her laugh, I thought I’d let you join in on the fun. Here is what I found:
The only similarity I found is blinking at a critical moment is a very bad idea. But, doesn’t that go for life in general?
XXX Annika
For 2024, I didn’t make resolutions or pick a word, like so many people do. I am a bit philosophical around this time of year, looking back and tending to look for ‘signs’ that give me a clue about what kind of year this is going to be.
The signs for 2024:
On 1 January I did a little bit of free motion quilting (just to free up my sewing machine) and started piecing a top that I started 15 years ago! A good start of the year!
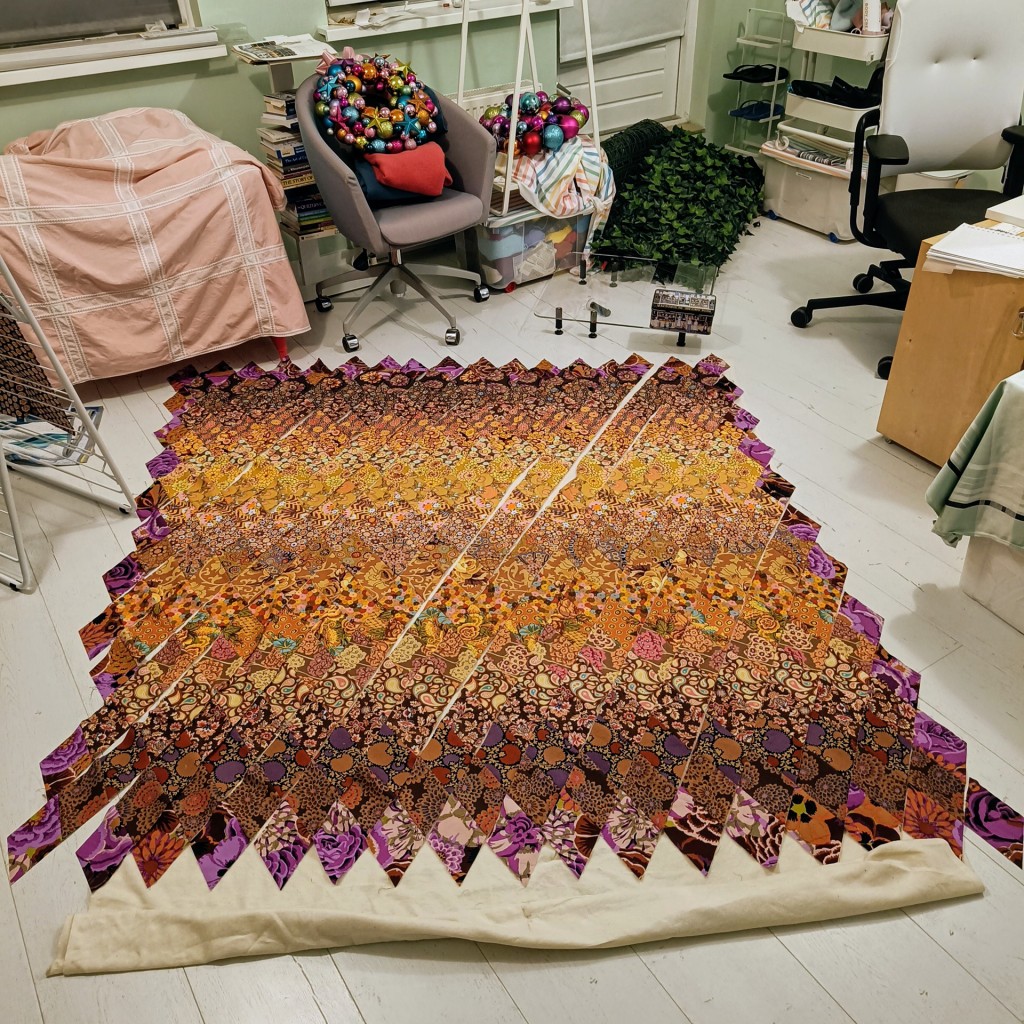
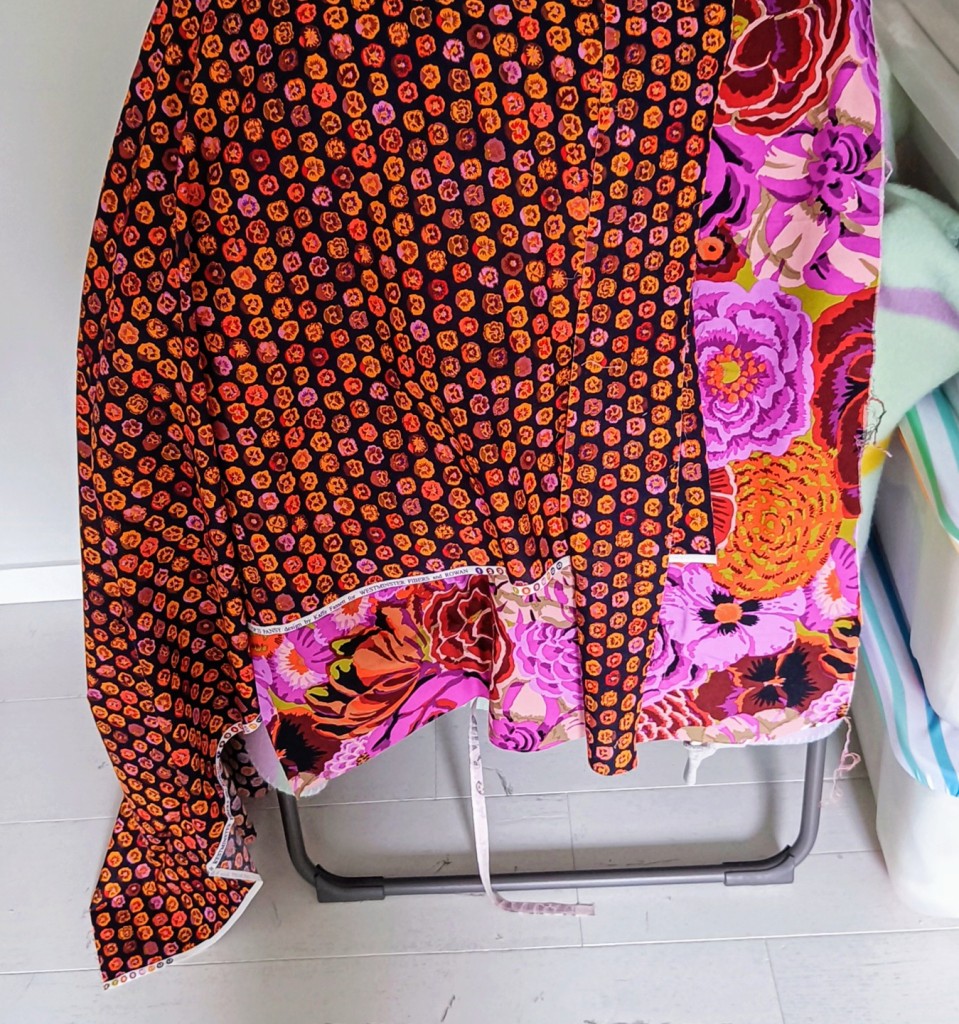
I tried to link to a post about this top, but I can’t find one. So, I will give you the summary instead. In January 2009, I did a masterclass with Kaffe Fassett in Leeuwarden (Netherlands) where I started this top. I had to do a lot more work than just piece rows, and I will show you a bit in the pictures.
Another sign: I had a job interview in January with a ‘new’ employer. Not bad for a slightly battered ’69 model 🙂. I was rejected, but hopefully there will be some big changes in 2024!
And I tried some new cocktail recipes. They were all nice to delicious. My collection of bar tools (even bar furniture!), glassware and ingredients that we started after our move, is taking up more size now than my chocolate stash, and is starting to rival my collection of chocolate bars in number.
I take it as a sign of continued joyful luxury and abundance 🙂. We have so much bottles of booze in plain sight in our living room and kitchen that my Mom now thinks we never drink anything at all! (Yeah, I have given up trying to figure out how her brain works a long time ago.)

After the wettest year in recorded history, we have been having some frost and snow. The potted violets outside my (other) office window shriveled and drooped dramatically. They looked like the sad contents of our fridge’s veggie drawer, three weeks after we decide making healthy salads for lunch is a good idea.
I was warned not to throw out deceased winter violets before Spring, because they come around. And lo and behold, after I had a couple of Corpse Revivers #2 (and the outside temperatures increased), they looked as perky as a certain mother, each time her son visits after she called him with a faint trembling voice that she feels like she is dying, and he needs to drop everything right this minute to come say goodbye.
I take it as a sign that things may not always be so dramatic as they seem, and sudden improvement of things is always possible!
And of course, 2024 will have an ‘official sign’ too. On 10 February, the Chinese Year of the Dragon starts. All positive things, this dragon.
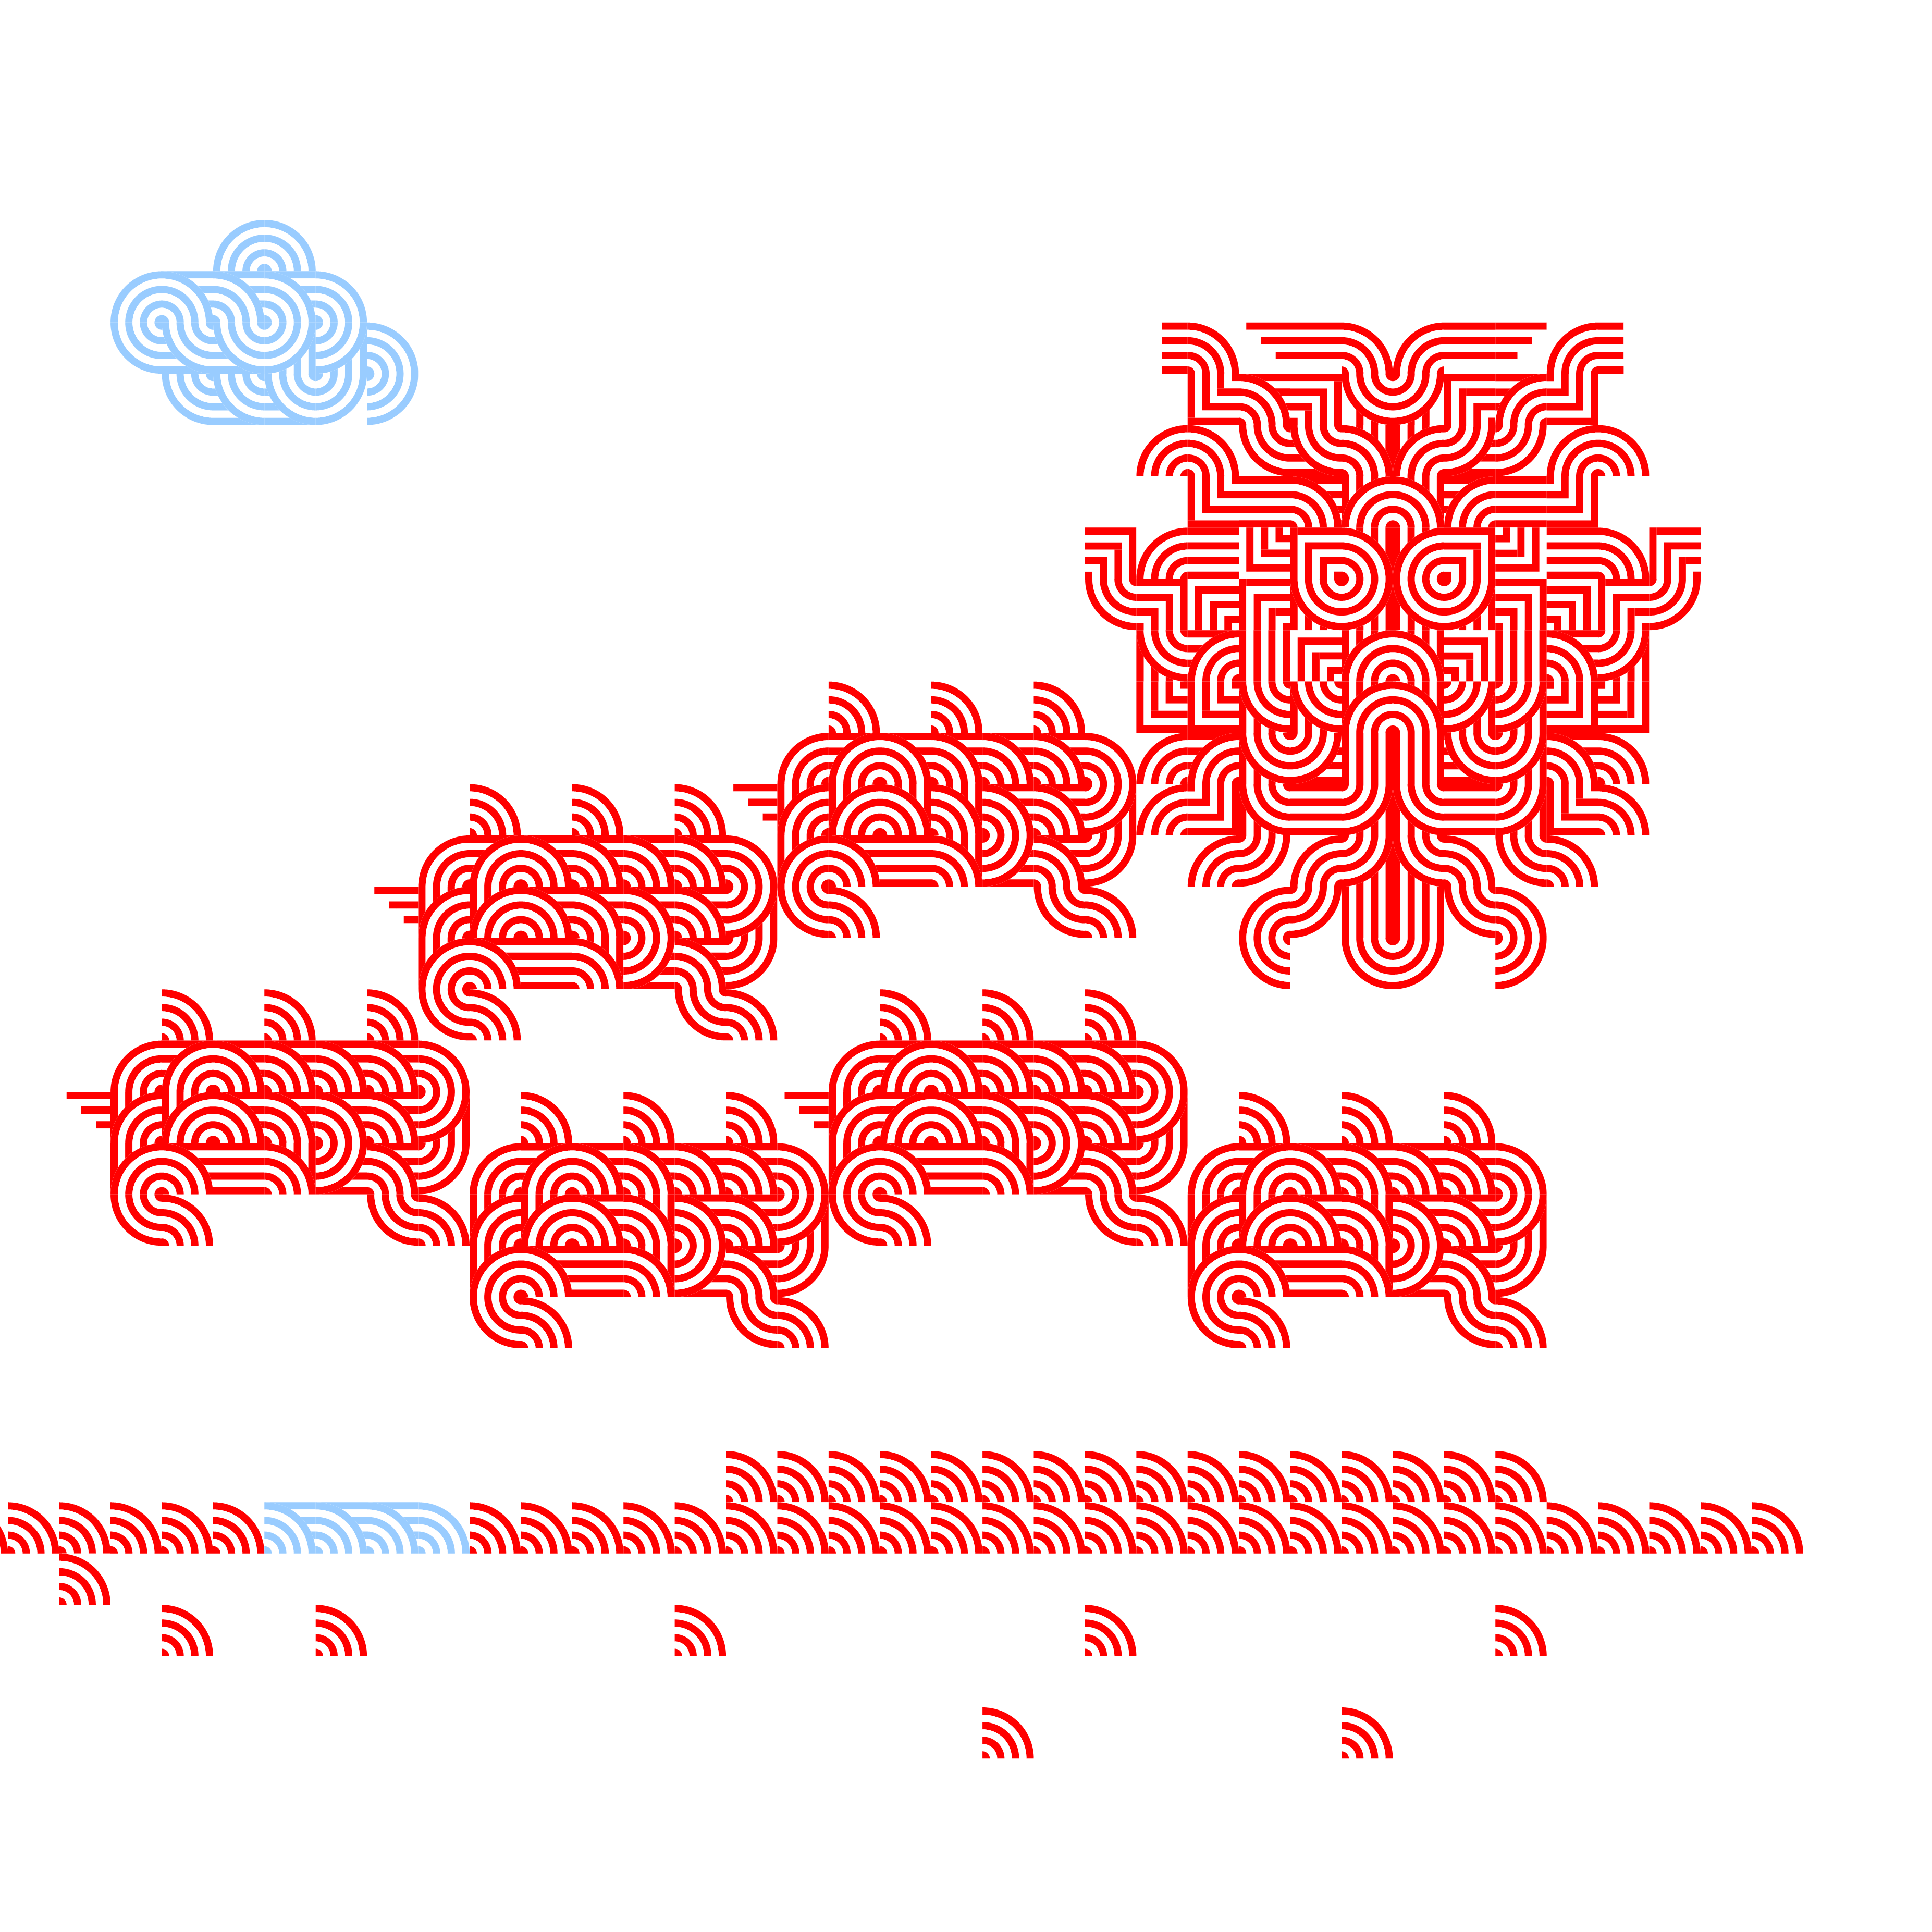
I wanted to see if I could draft a fantasy dragon in EQ, using only 4 simple blocks. My work in progress is shown at the top. I think I am happy with the dragon, although the head grew rather large compared to the body. Perhaps he needs some longer, flowy whiskers.
I wanted to add some clouds and some waves too. I just started those, and am far from satisfied yet.
I’m not sure if I will finish this design. For something like this, I start out fairly random in a really large quilt layout. I do not work from an example or a sketch or anything. I have a vague idea of what a Chinese dragon looks like. I just started with the dragon’s eyes, and went from there.
It’s all just trial and error, adding blocks one by one, rotating, replacing and adding some more blocks as I go. If I end up with a design I like, I would most probably have to start over completely to get a nice composition in a layout that just fits. That’s a lot of boring work.
And somehow, I doubt that 2024 will be about perfection!
XXX Annika
I haven’t been very creative or productive this past year. But, I wanted to keep up with the annual tradition of posting a Christmas quilt on this blog. Only it’s more of a winter quilt than actually Christmassy.
Like last year’s Christmas quilt, this is an older design that I only updated slightly. This one is from 2014, including the mostly black and grey coloring. And it suits my current general state of mind. More in the mood for calm, classy and a touch of whimsy than full out holiday cheer. I haven’t published this one before, so it is actually new to you!
I felt it was time I put something on the blog for Christmas especially for all those who find this a difficult time of year, especially if they feel forced to participate in all of the omnipresent ‘holiday cheer’.
Back in 2014 I was designing with strips and bars. This reindeer block was inspired by nordic jacquard knitting motifs like Fair Isle sweaters, and cross stitch samplers.
I haven’t tried to work this out, but I guess you could make a (cheerful) scrappy version using Inklingo logs stitched together, provided there is enough contrast between the reindeer parts and the background. I drafted these as 16 inch [40,6 cm.] blocks.
To view some previous designs in this strip style, click here and here and here
Wishing you lots of love, joy, happiness, health and creativity in 2024!
XXX Annika
Maybe this title is a little too cryptic for you? Read on!
I received the wonderful news that people in the EU can now also buy downloads from the Electric Quilt Company! This has not been possible for many years, because of tax rules. Let’s all say thank you and give a big applause for the lovely Diane from EQ, who worked very very hard to make this possible!
I published this collection of blocks 11 years ago when EQ still had ‘My EQ Boutique’. My EQ Boutique blocks at that time were downloadable as complete collections, but also as single blocks! They worked as stand alone software, so EQ was not necessary. And they came with sewing instructions. A lot has changed since then.
My EQ Boutique Blocks are now only available as regular EQ add-on block collections, under the header Boutique Blocks. They work with EQ7, EQ8 and EQStitch, and some (including mine) also work with EQ Mini.
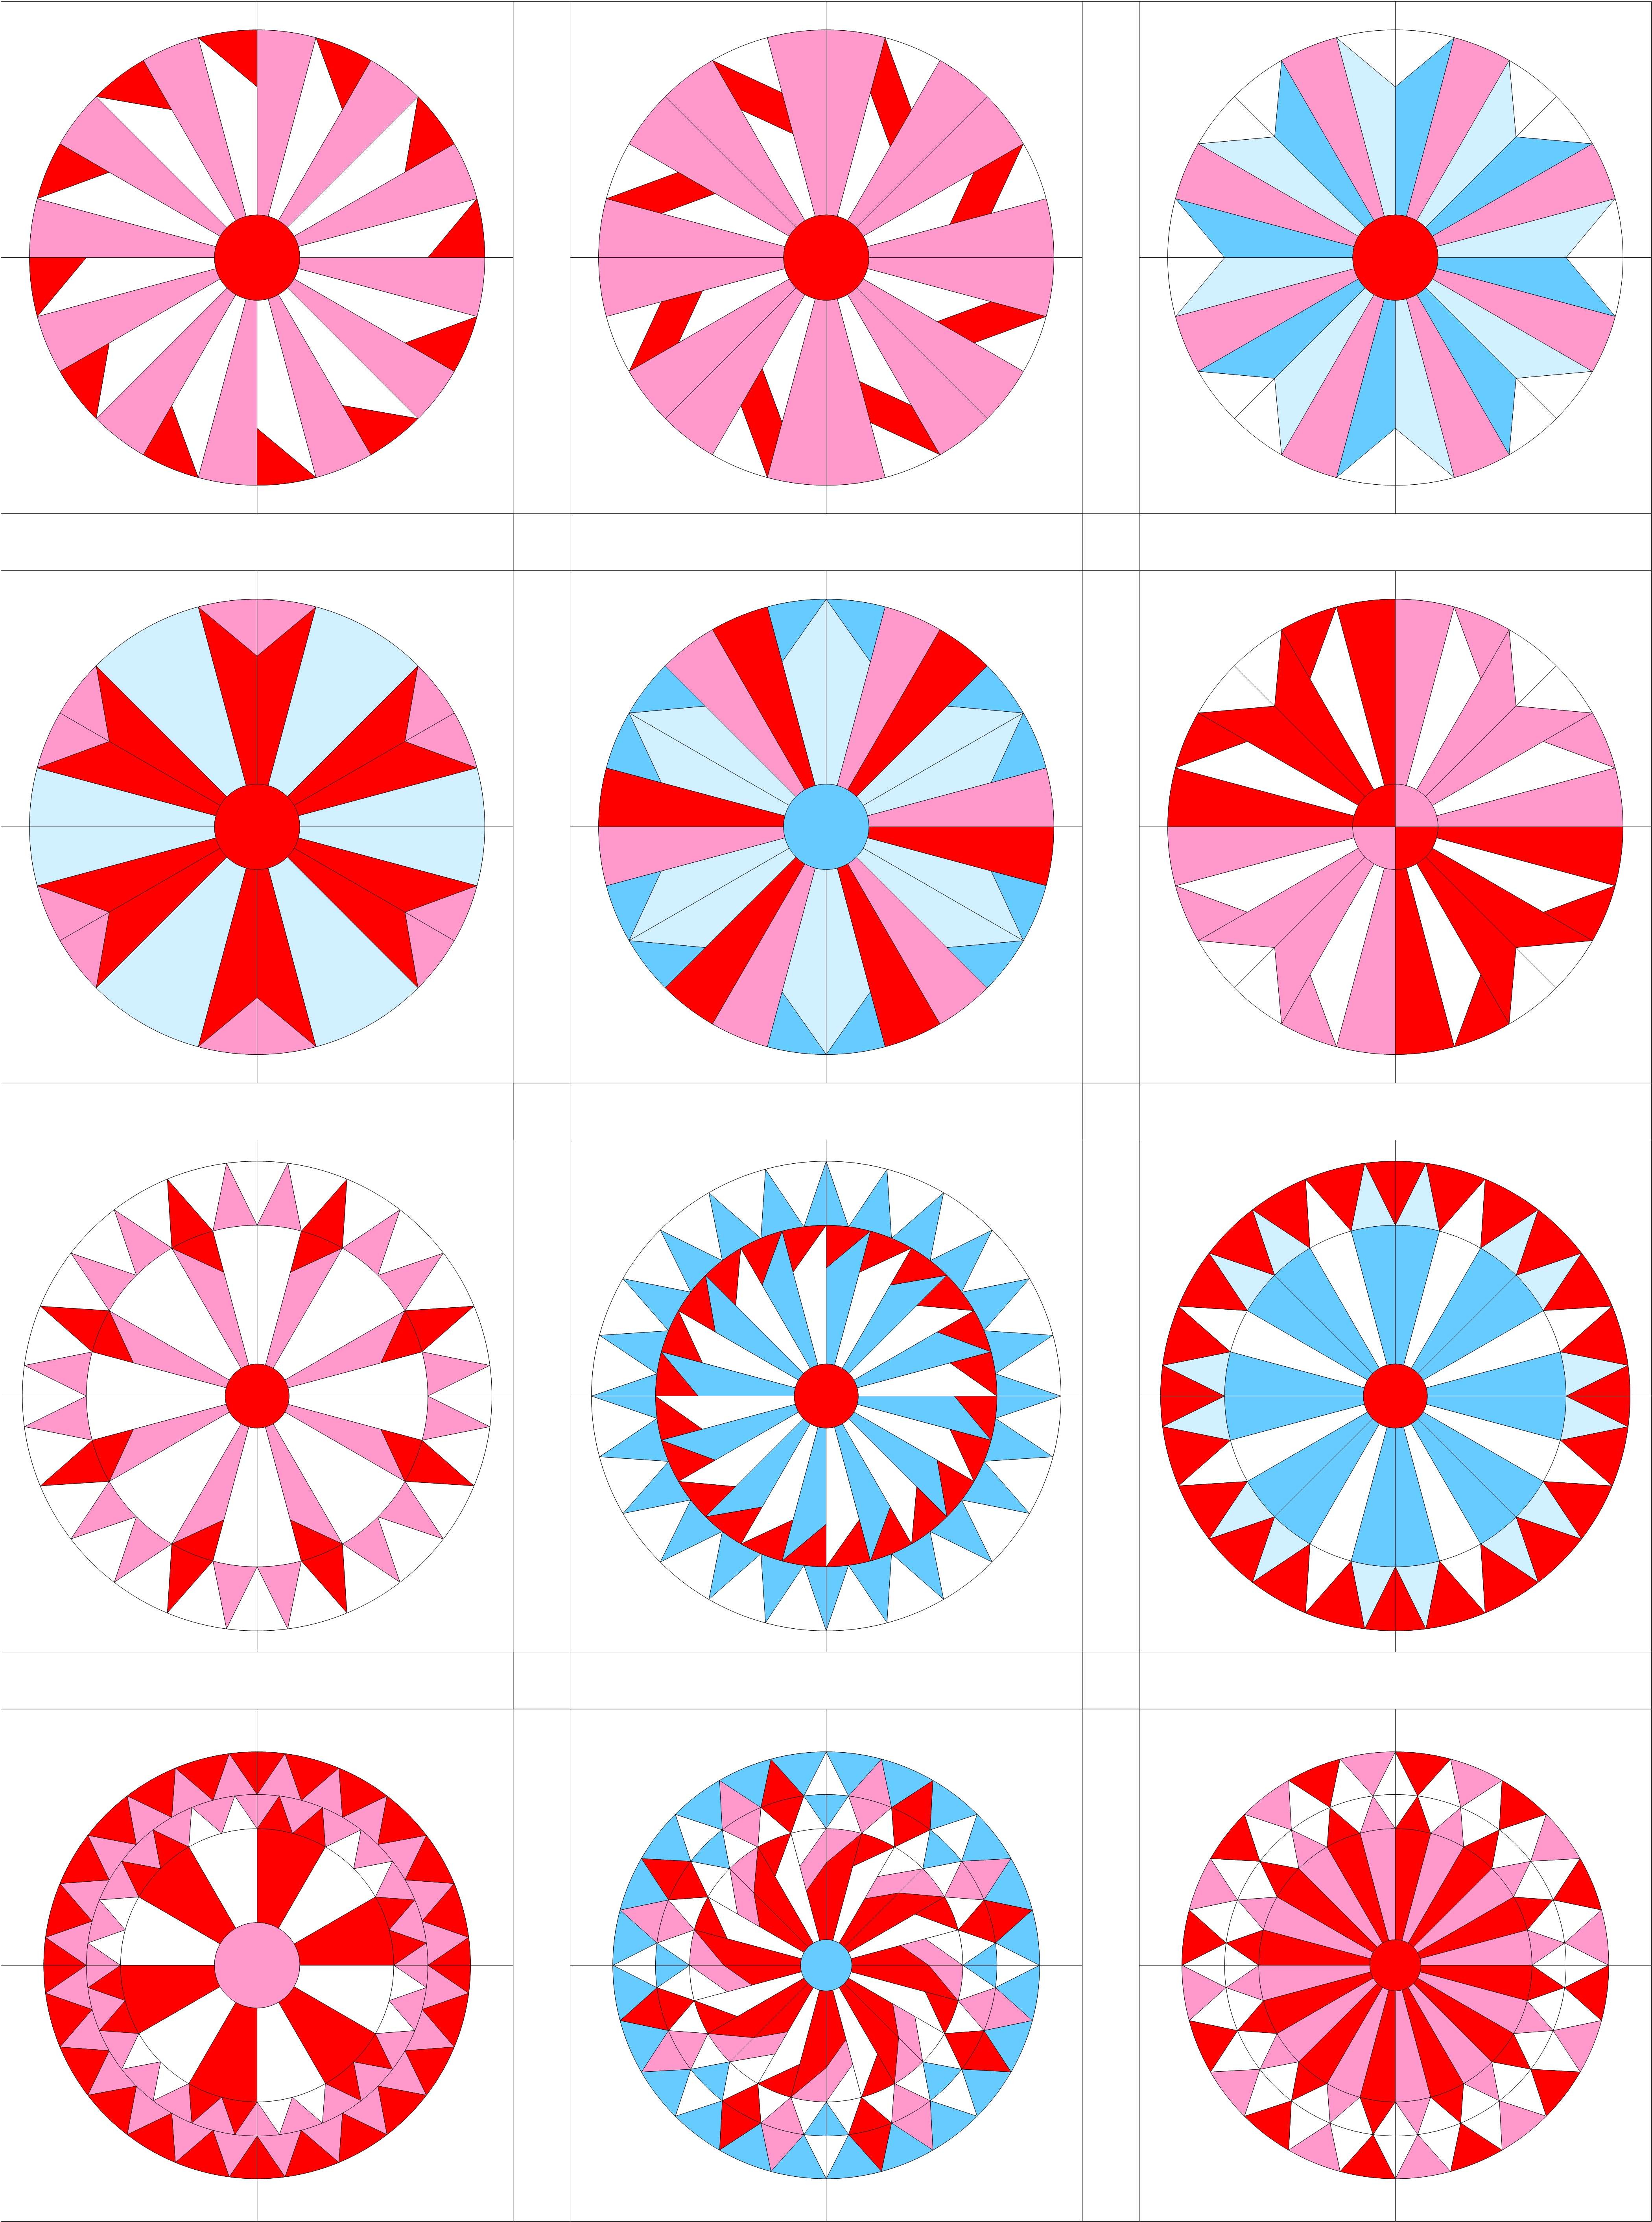
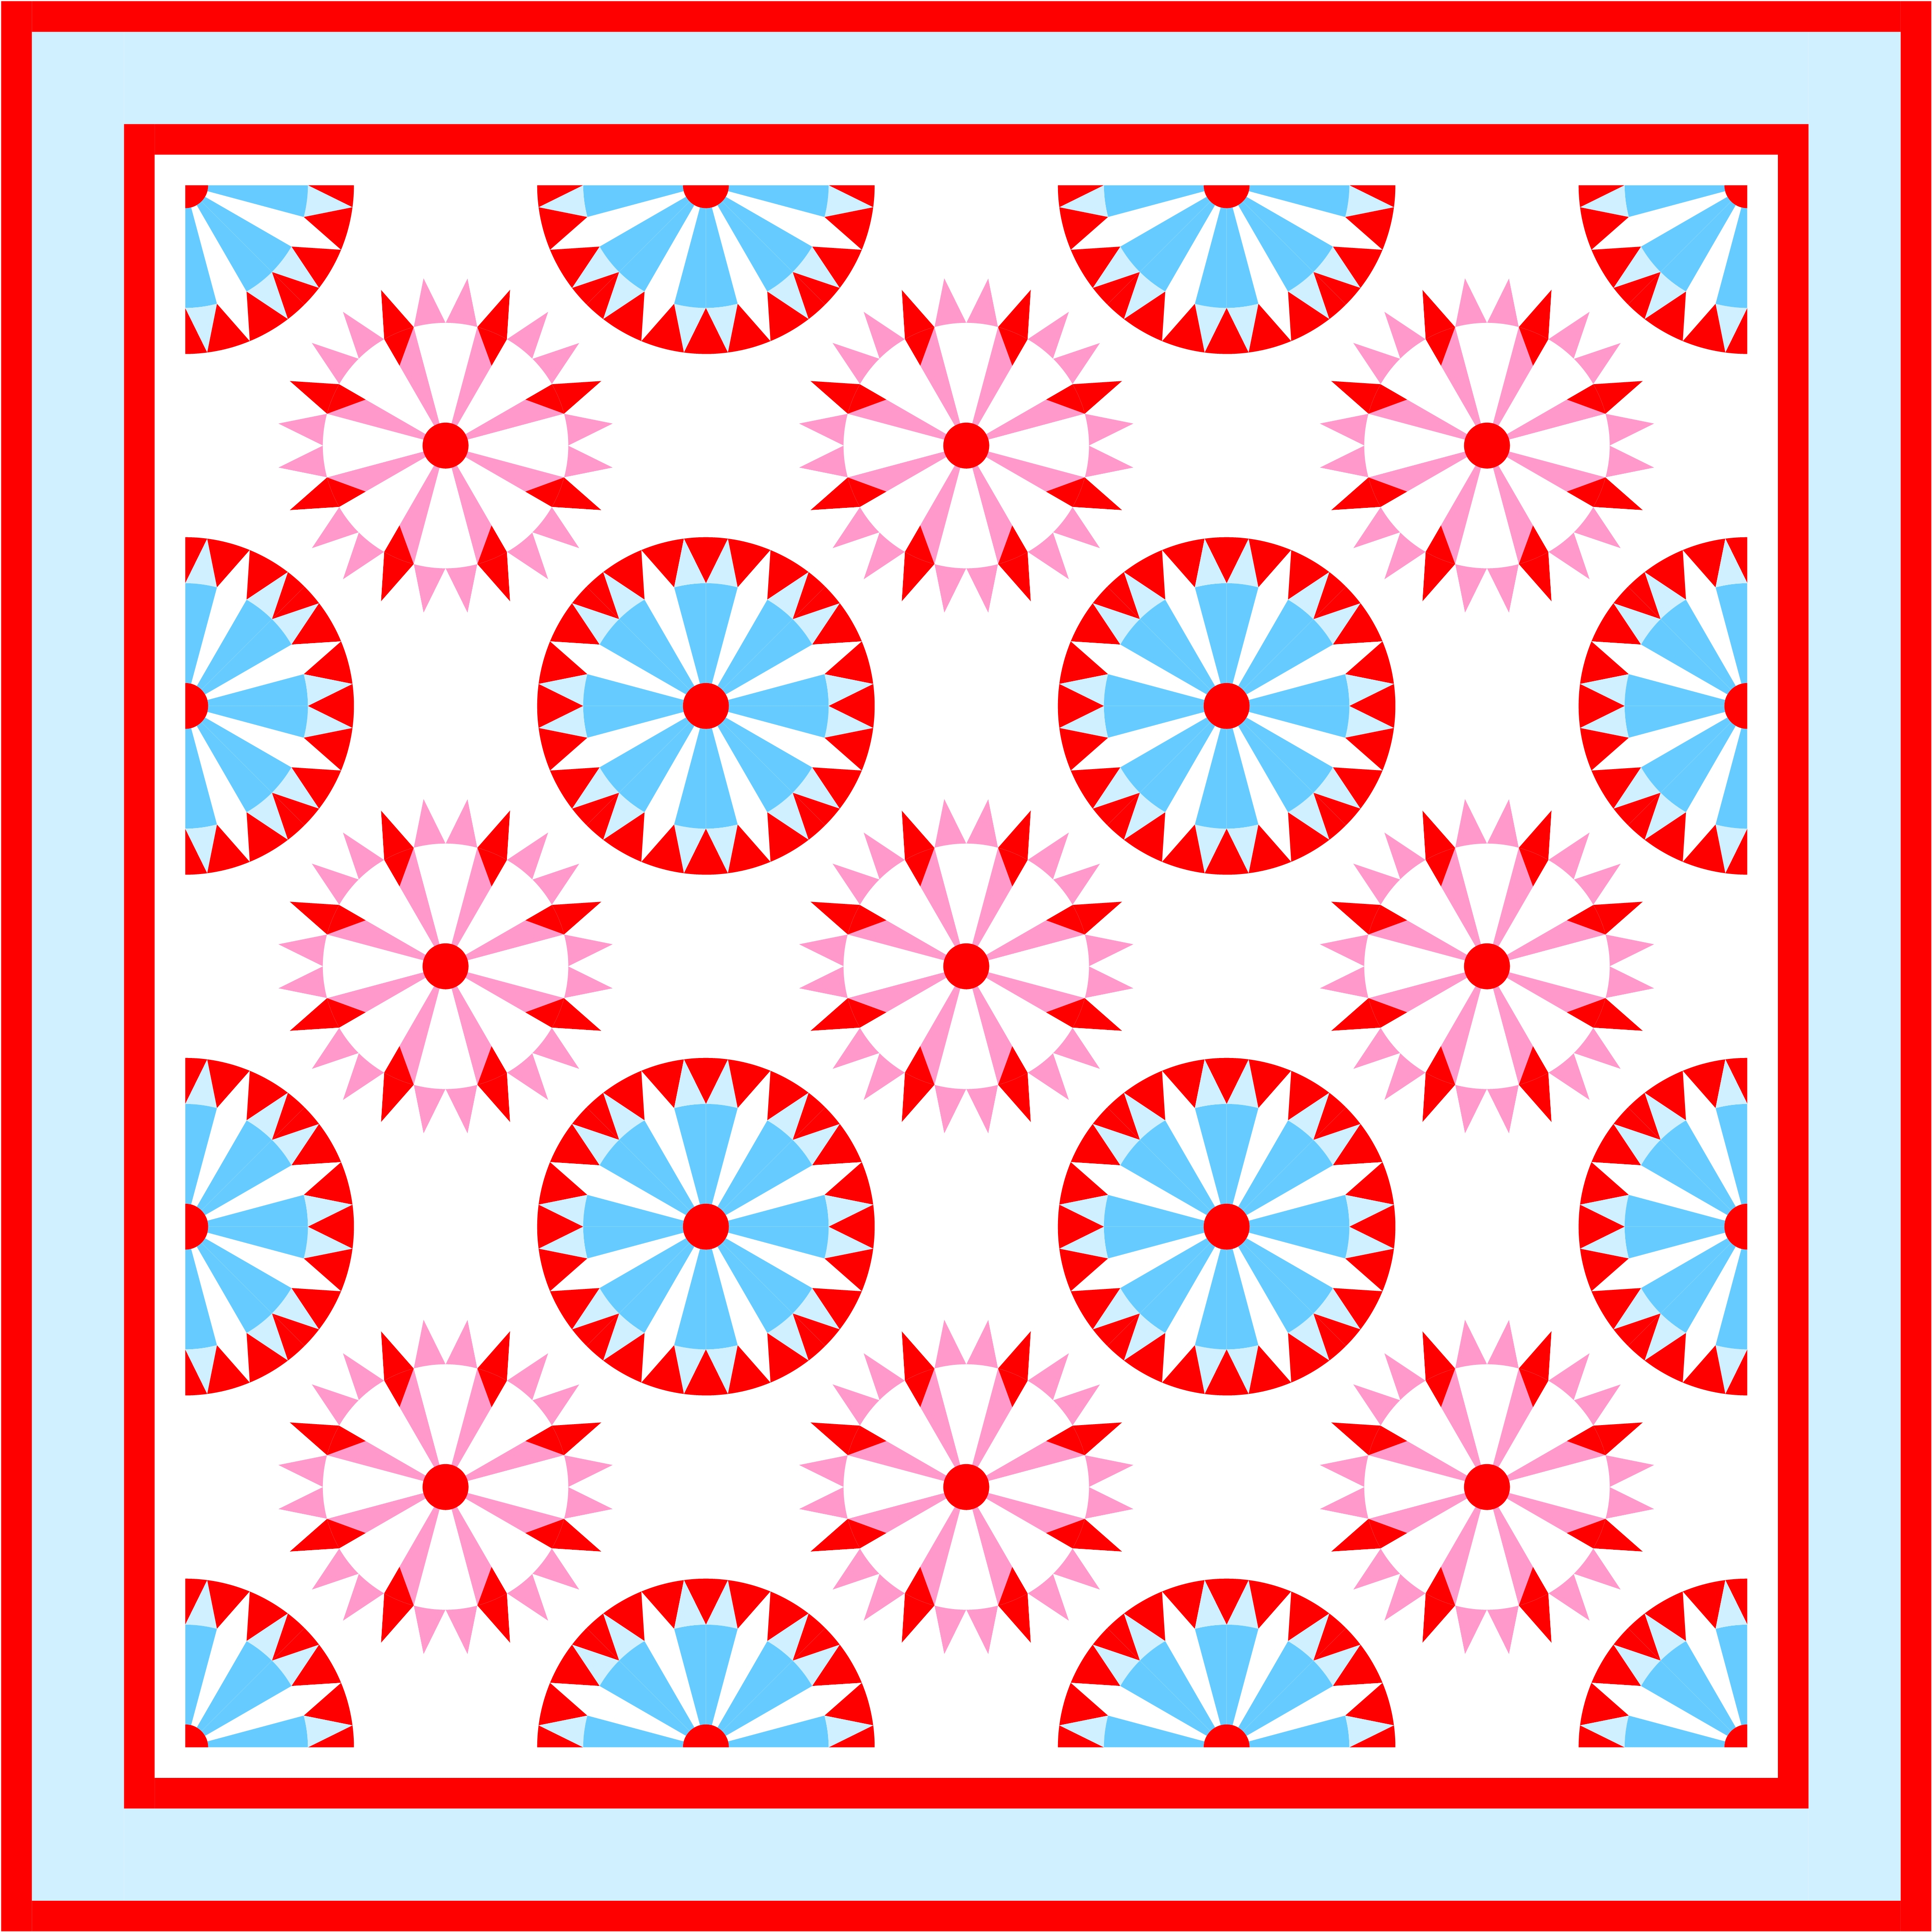
The EQ site says my collection consists of the 12 blocks pictured here (above). It is in fact much more because you can make each block in at least 5 different ways, by swapping out center circles and, and using no outer ring, one or two outer rings with triangles in several variations! In this post from 2012, I explain this with pictures.
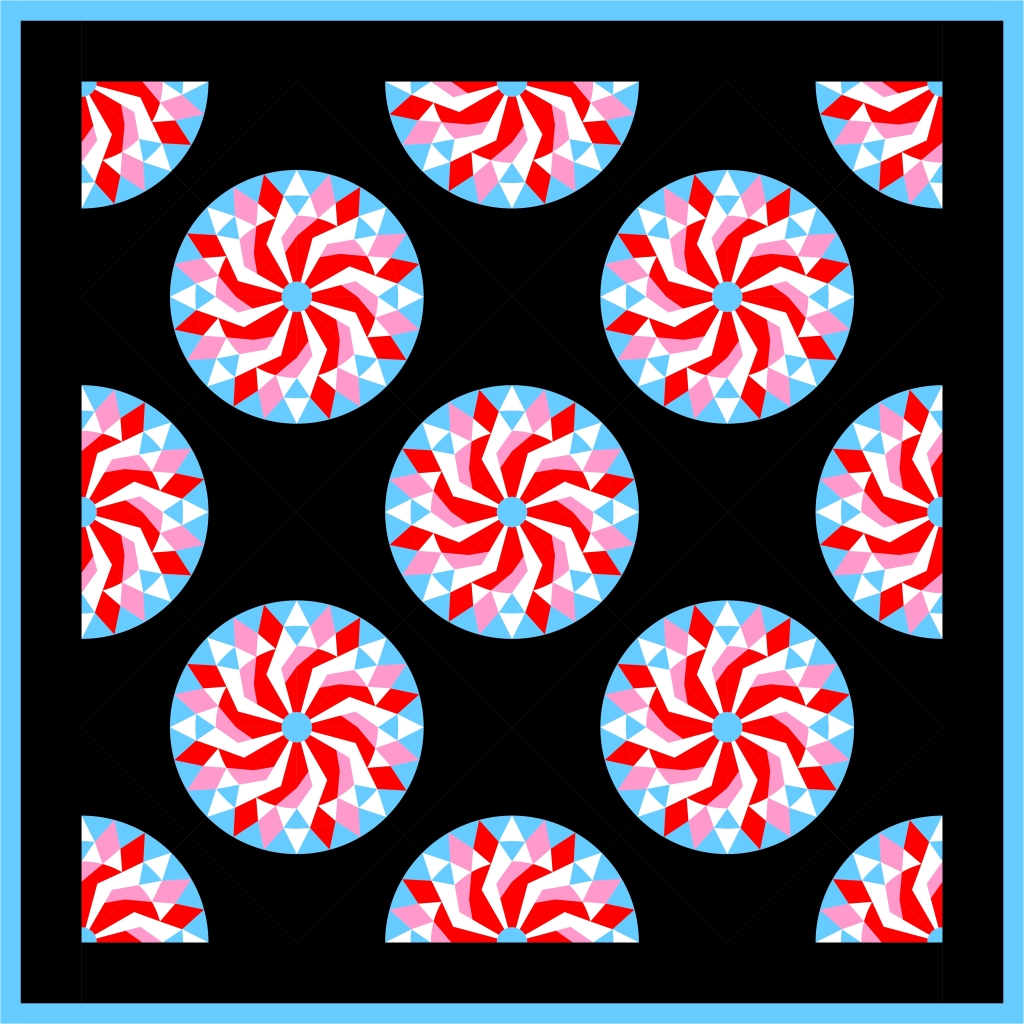
You can make some really spectacular quilts with these blocks. I am showing you some examples I designed in 2012 at the end of the post.
Why would I buy this if I am an Inklingoist? Great question!
I am a 100% Inklingo believer, and still took the trouble to draw these complicated blocks in EQ. (In fact, I drew many more!). I do that because for me, EQ and Inklingo is the perfect combination.
You don’t need EQ to use Inklingo shapes. Linda Franz has even provided a perfect design book for Dresden Plates. But I like testing out block combinations, auditioning fabric choices and color variations etc. for my Inklingo ideas in EQ.
And by offering these blocks as EQ add-ons I made all of that easier for you, too. Inklingo’s Linda Franz has provided many, many more block variations. They do not all fit in an EQ add-on. If you have the EQ add-on, and have your heart set on Inklingoing a different Dresden Plate Variation, you can easily create most of these variations in EQ by adding or deleting lines in the blocks. That’s much easier than starting to draw from scratch.
So, I hope you will be inspired to consider making a Dresden Plates variation quilt, with or without Inklingo.
XXX Annika


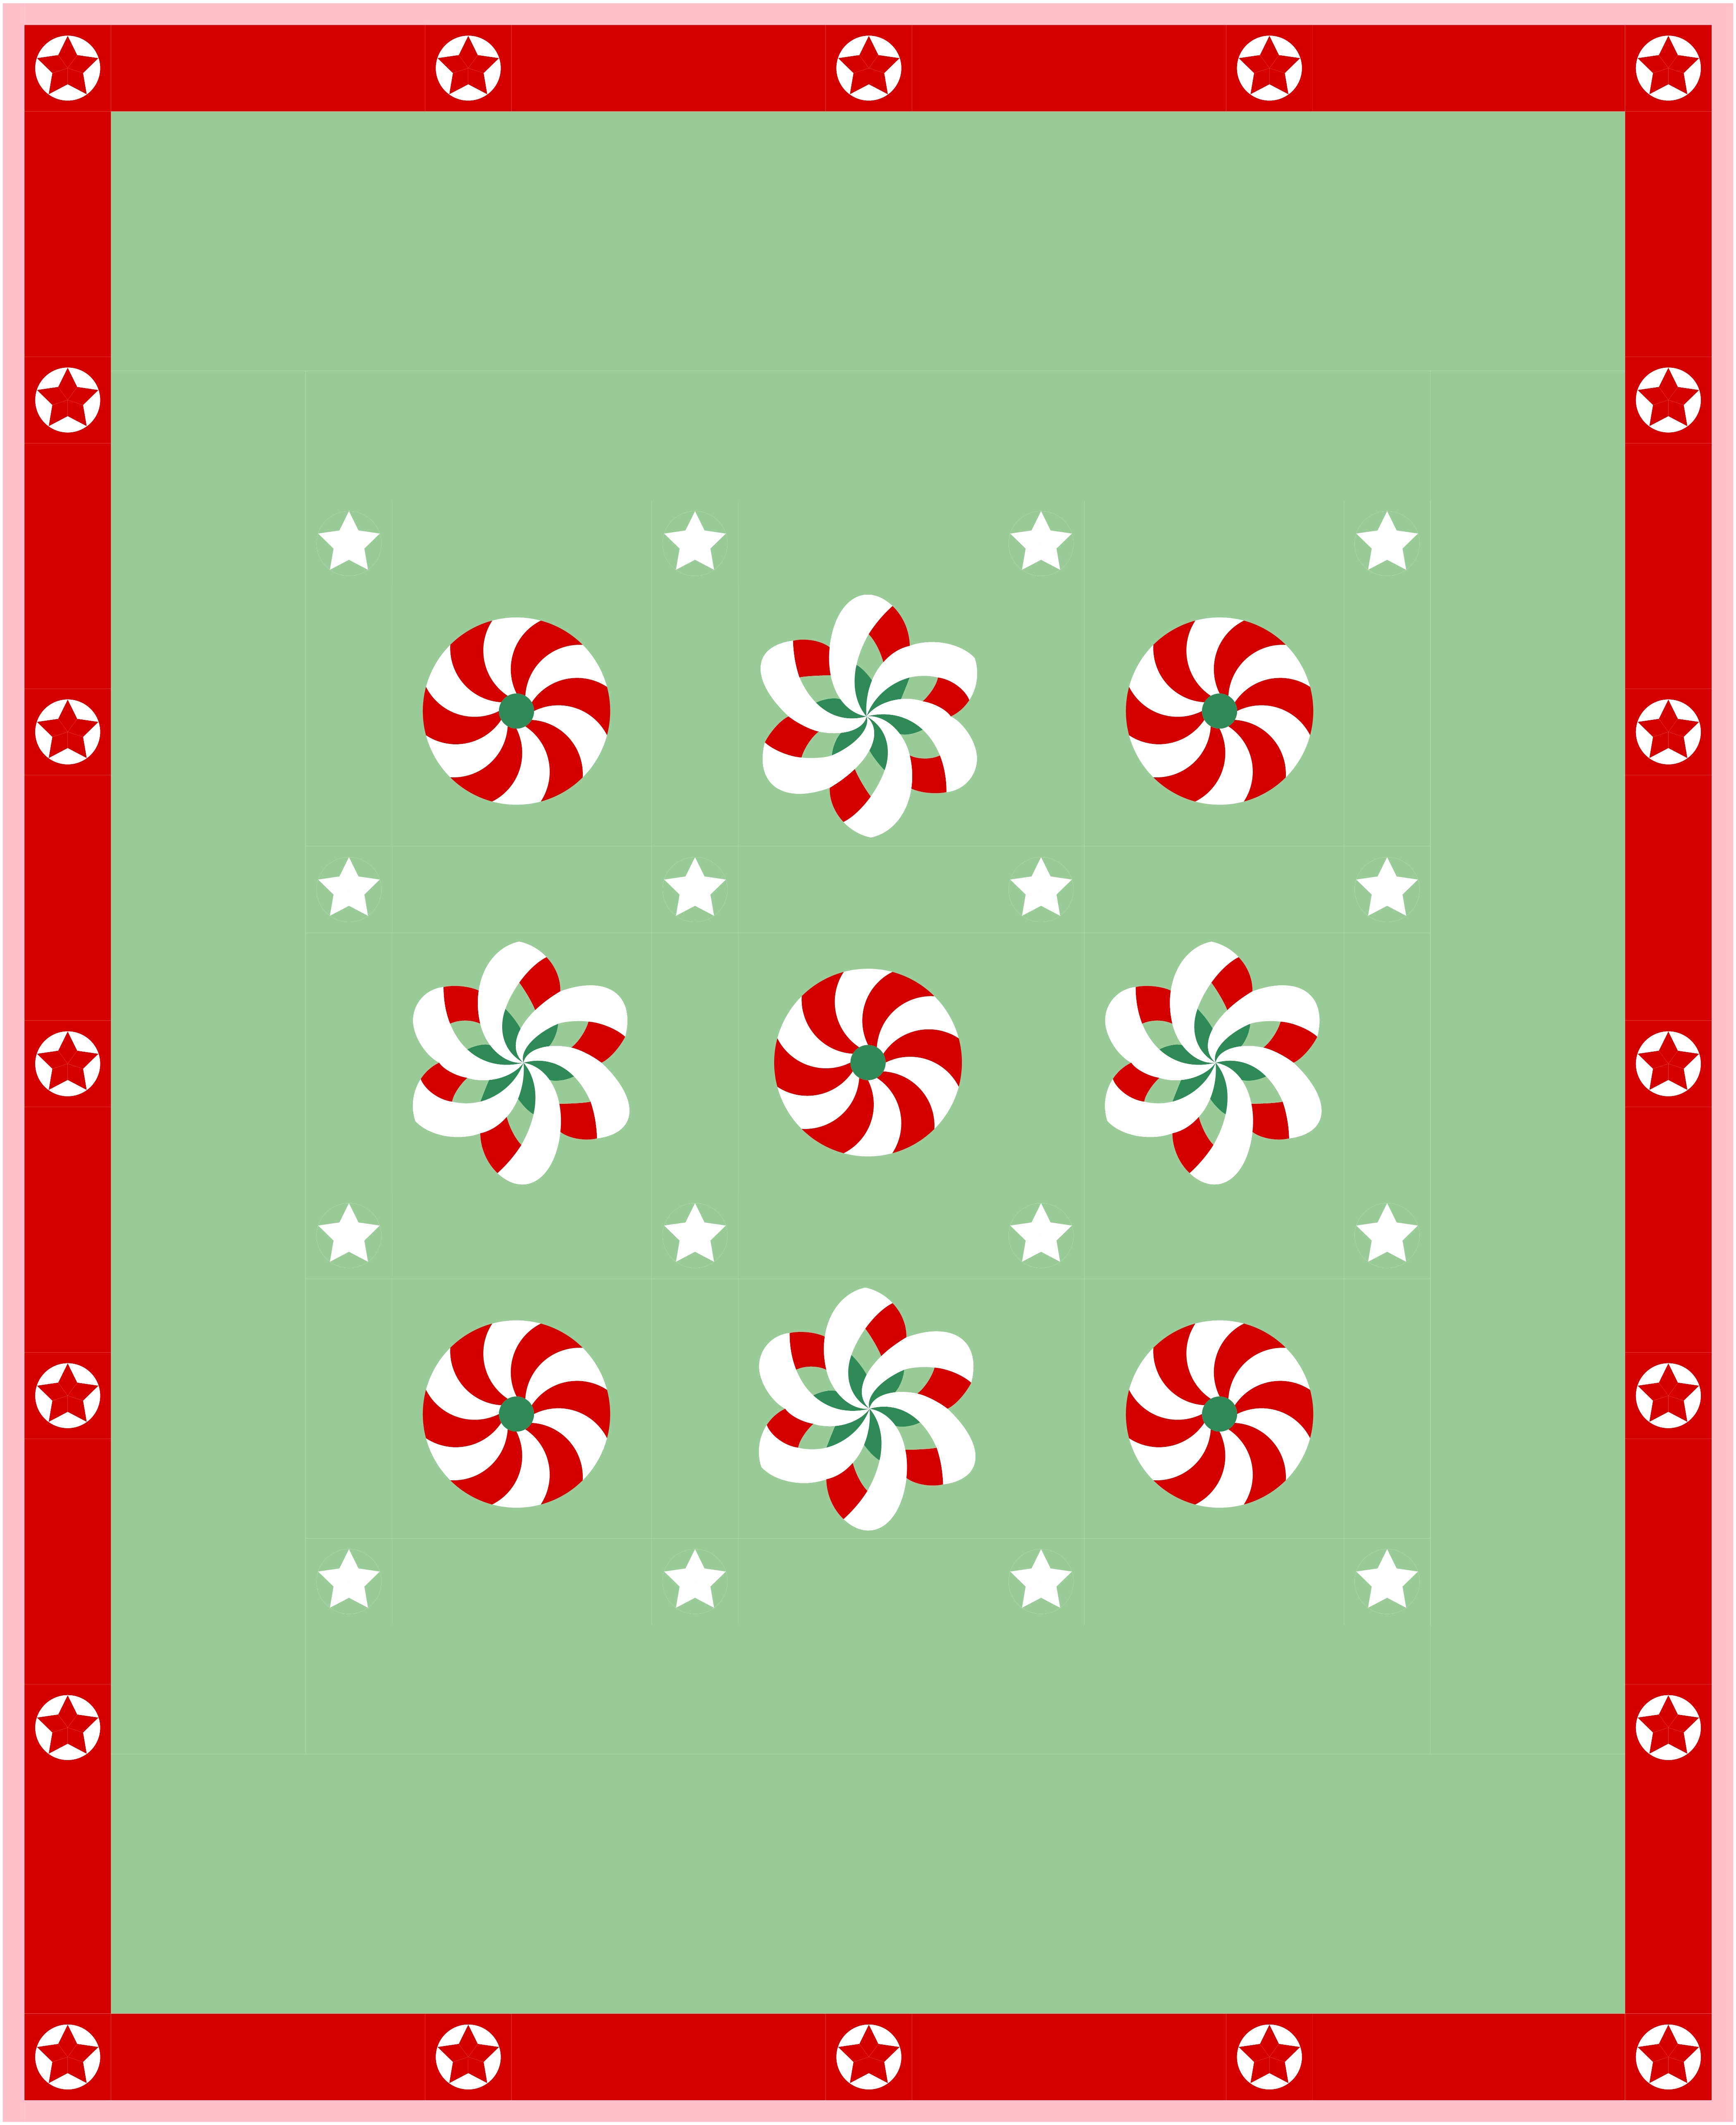 Like I announced in this post, I dug up the files for my 2017 Christmas quilts (they hadn’t transferred to my current computer) to make some updated Inklingoable Christmas quilts. I replaced the 4.5 inch [11,4 cm.] Inklingo LeMoyne Stars (from the free shape collection,!) and 3 inch Inklingo LeMoyne Stars with 4 inch [10,2 cm.] five pointed stars.
I think the eight pointed stars from the 2017 quilts look more like snowflakes, and the curved shapes of the five pointed stars in the 2022 quilts are more harmonious with the other curved blocks.
These quilts use the 12 inch [30,5 cm.] Inklingo Ribbon Flower and 9 inch [22,9 cm.] Inklingo Dresden Plates. The Inklingo Dresden Plates finish at 9 inch [22.9 cm.] originally, so I virtually put a 1.5 inch [3,8 cm.] frame around each block, to make it finish at 12 inch.
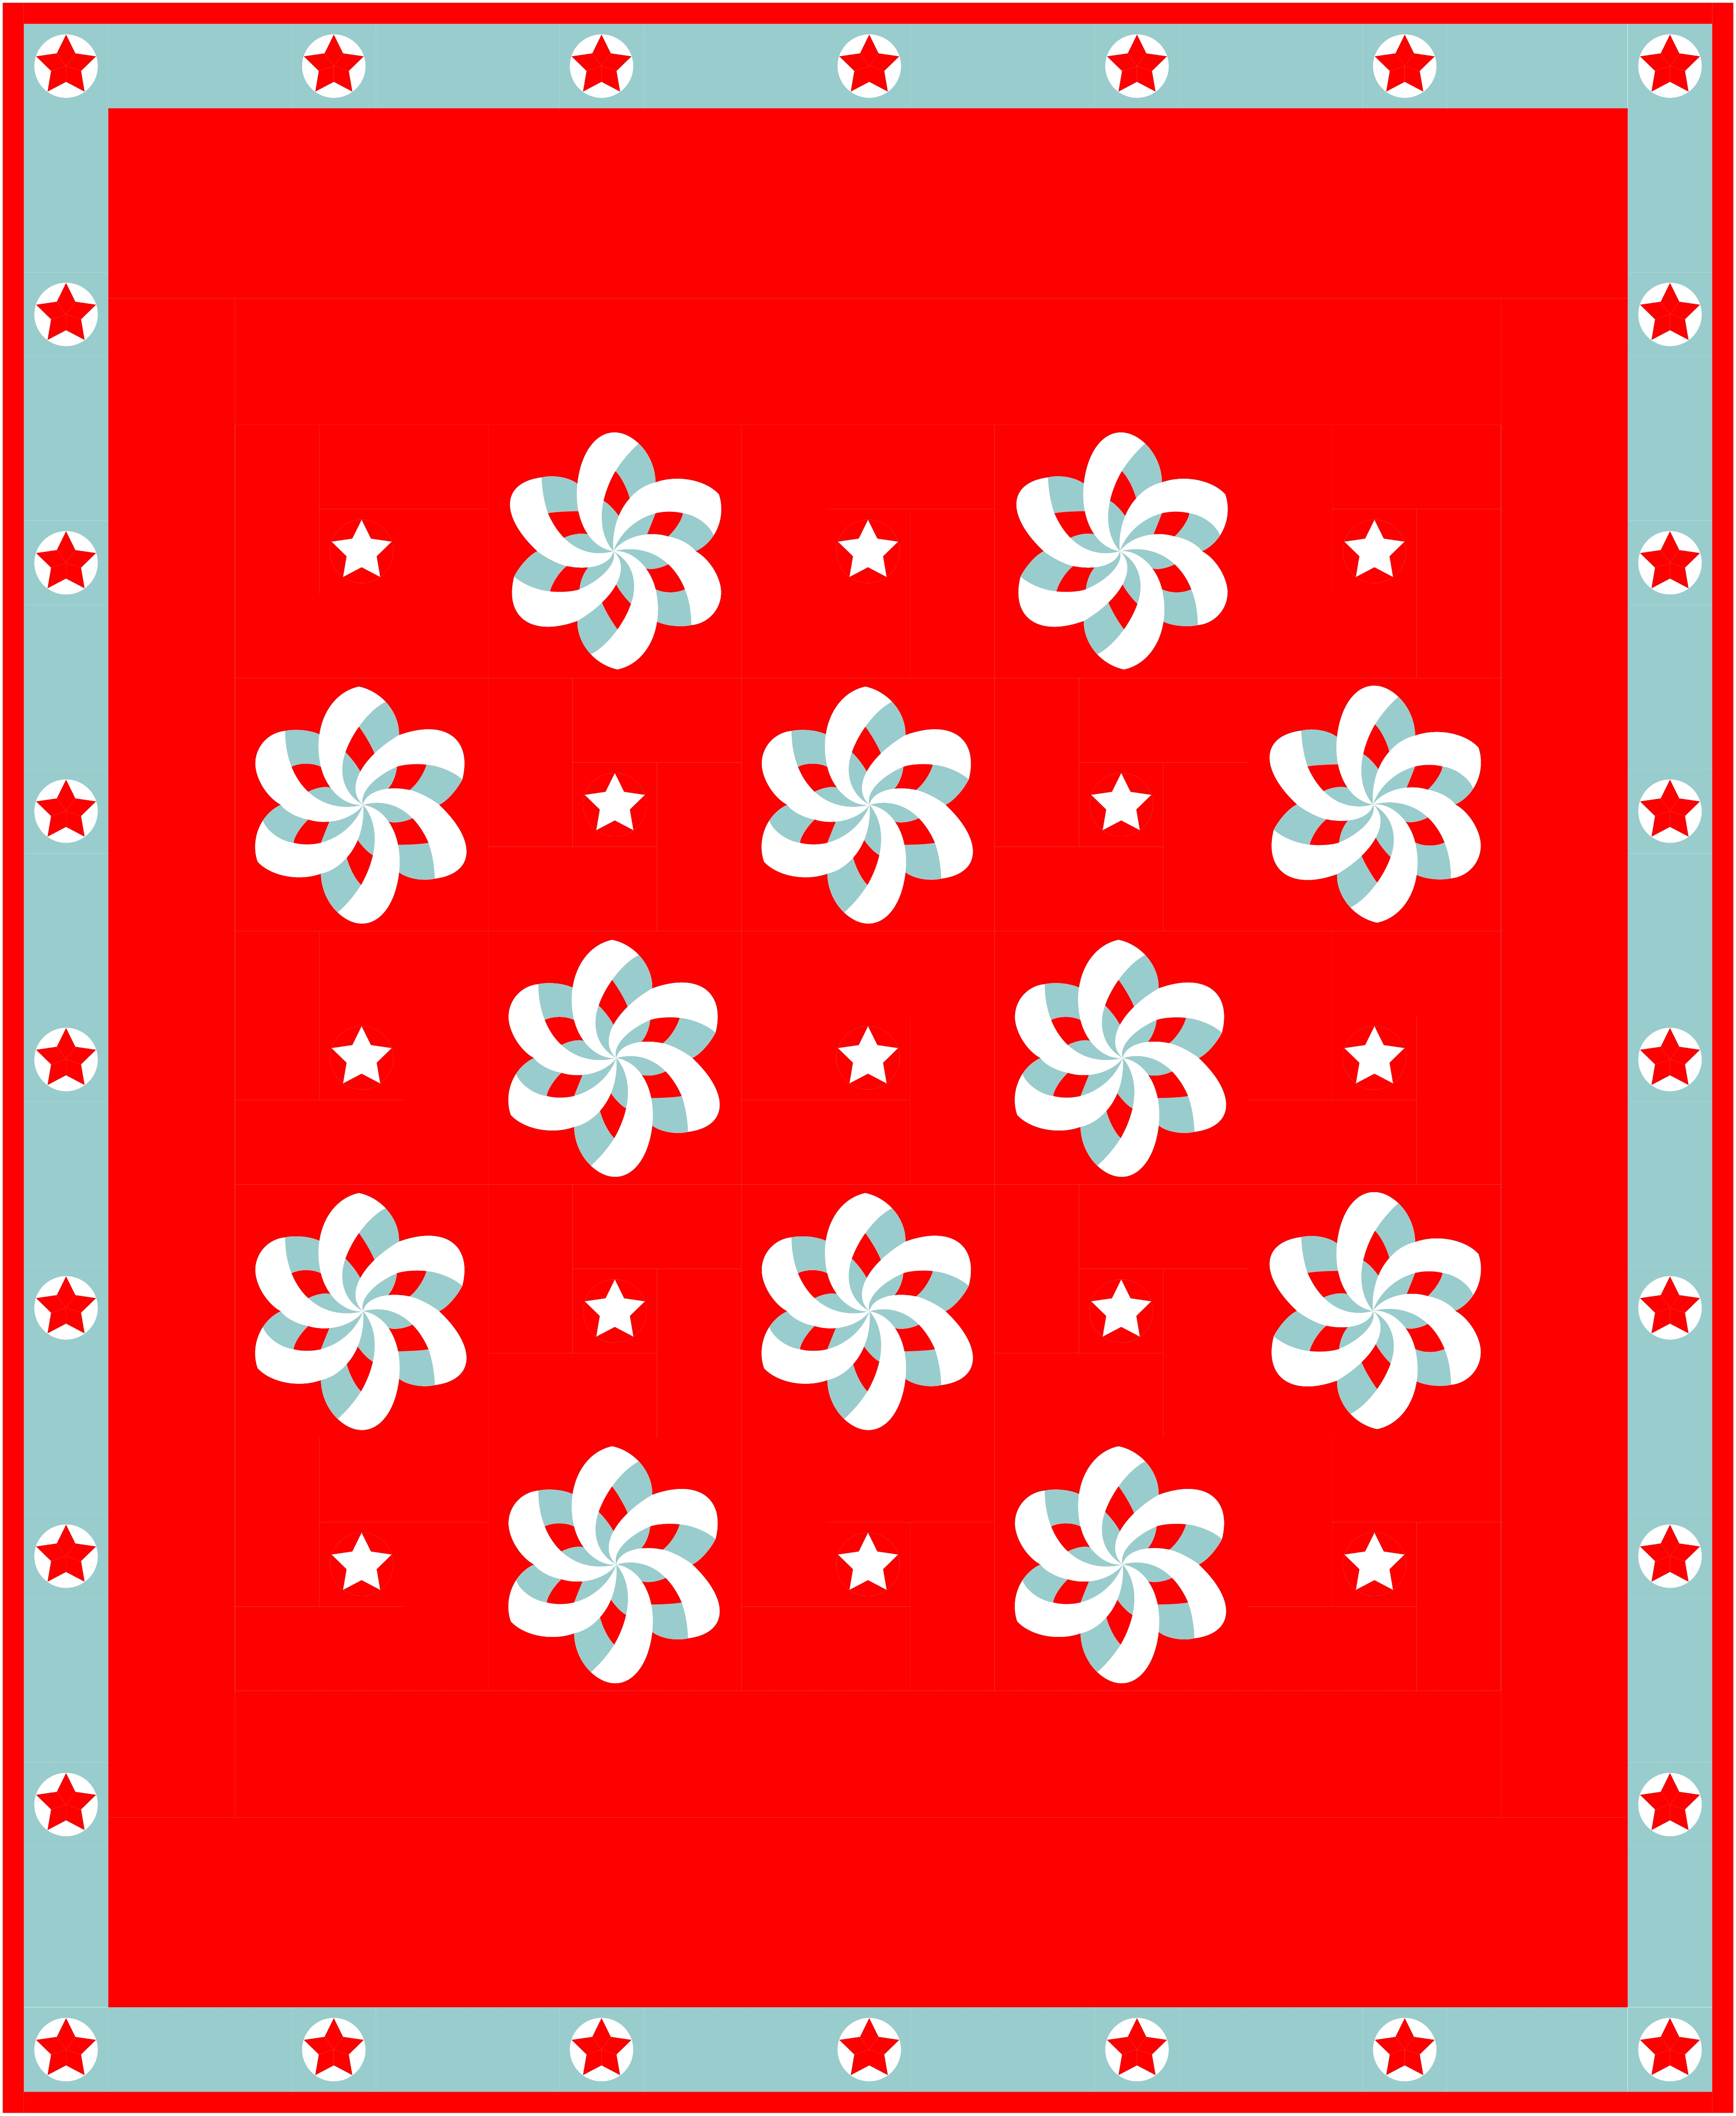
2022 Christmas quilt with 12 inch Inklingo Ribbon Flower blocks in a straight set, alternated with framed 4 inch Inklingo Five pointed star blocks – Original Quilt design by Annika Kornelis
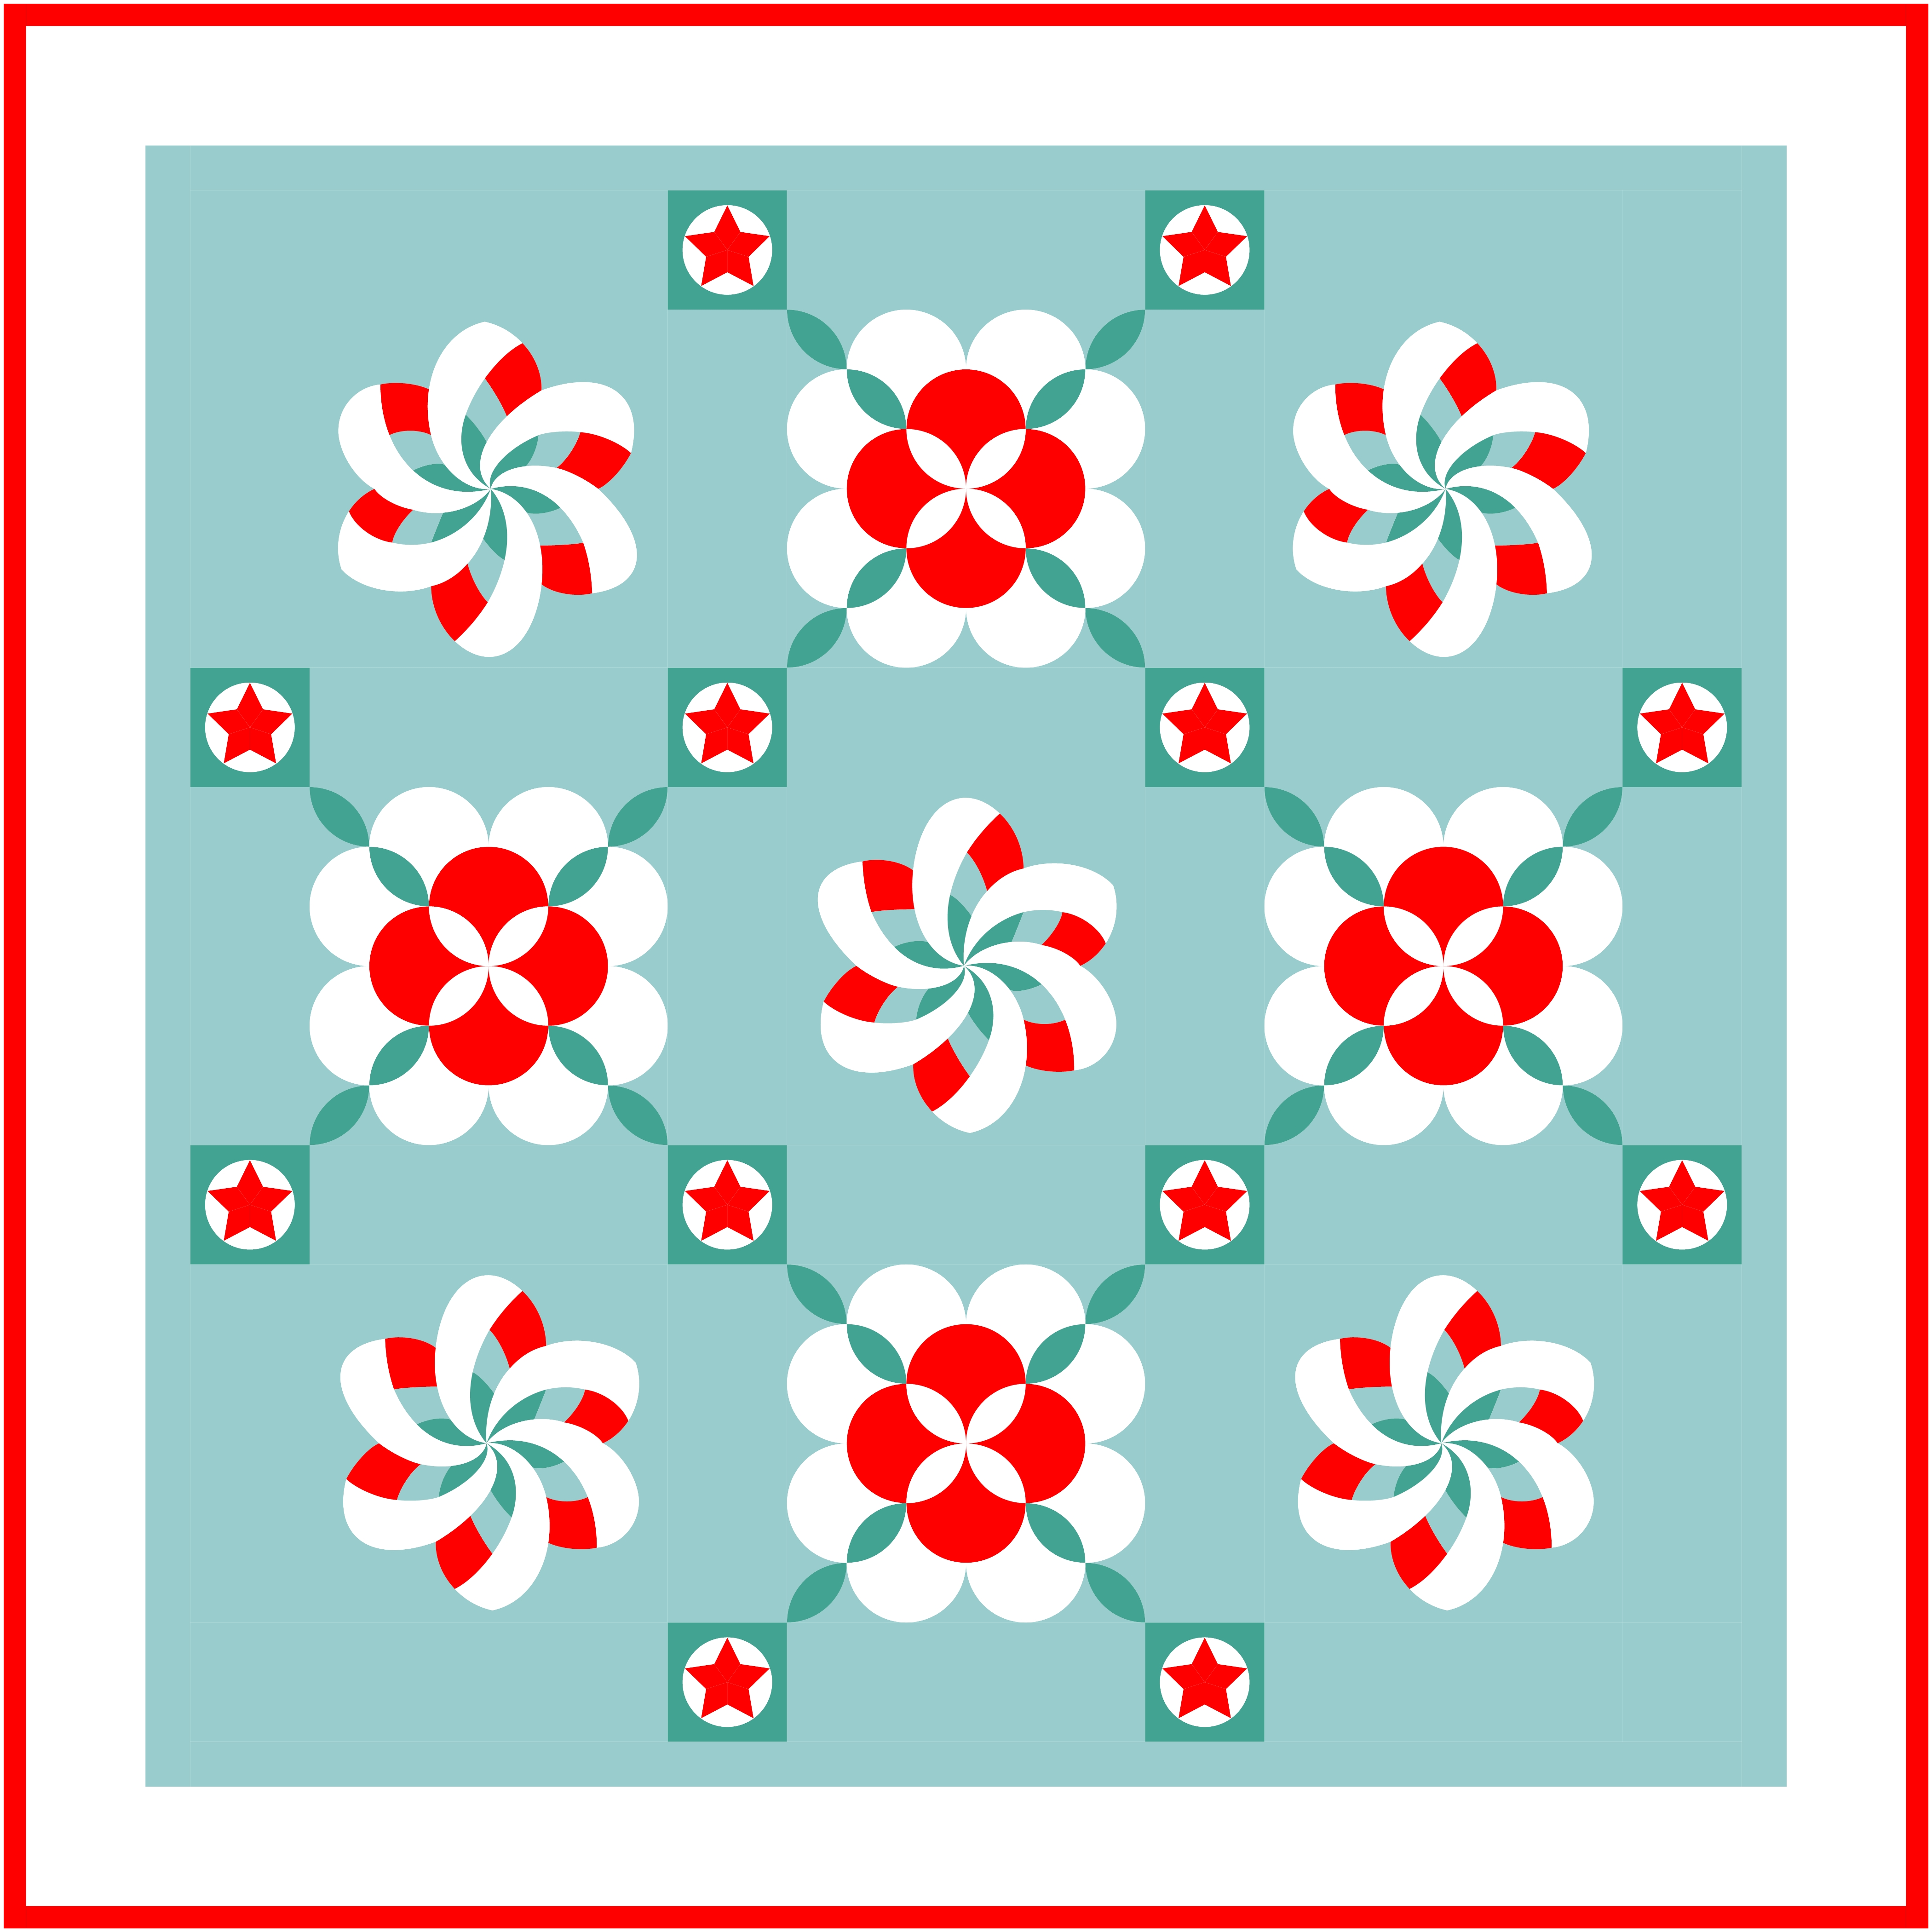
And my final updated Inklingo Christmas quilt design. This time I combined the Ribbon Flower blocks with Inklingo Clamshell Rose blocks, with the 4 inch clamshell shapes in a 12 inch block. Like in the top quilt, 4 inch sashings with the 5-pointed stars in the cornerstones.
Merry Christmas and ‘Vrolijk Kerstfeest’ from Rotterdam!
XXX Annika
Well, it’s been a while, but I promised you more quilt designs with Inklingo Fivepointed Stars blocks, a bit folksy this time.


These are all 10 inch [25,4 cm.] blocks. The sashings are 2 inch [5 cm.]
You can use the Inklingo 1 inch Log Cabin shape collection to frame the Five pointed star blocks.
The 9 inch Schoolhouse blocks need a 0.5 inch frame to finish them as 10 inch blocks. In the picture I used the sashing color for these narrow frames. It makes the sashing look a bit irregular, but using the same color is probably easiest to make a narrow strip look neat in an actual quilt.
Inklingo has 0.5 inch Log Cabin shapes, but they only go up to 5 inch long. If you print two in a row and don’t cut them apart, you could use them to frame the blocks, trimming off excess on the outside after piecing.

Again 10 inch [25,4 cm.] Log cabin blocks, using the 4 inch Five pointed star as the center, framed by 1 inch Inklingo Log Cabin shapes.
I alternated these with unpieced blocks. If you wanted, you could applique the same stars on those blocks. The Inklingo shape collection for the Five pointed stars provides an applique option too.
I designed this quilt with scrappy fabrics for the logs and alternating blocks in mind. It still looks a bit coordinated, because truly scrappy coloring was too much work in EQ. Of course you could also do scrappy stars.
XXX Annika
