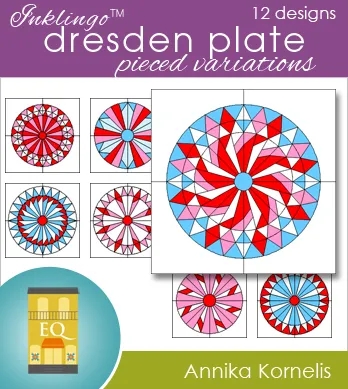
Testblok, My EQ Boutique Inklingo Dresden Plate Pieced Variations nr. 11
Click here to go straight to English
Ik heb jullie in deze post beloofd meer te vertellen over hoe ik mijn proefblok voor mijn My EQ Boutique patronen heb genaaid, en wat ik heb geleerd.
Er zitten geïllustreerde Engelstalige naai-instructies in de My EQ Boutique collectie blokpatronen Inklingo Dresden Plate Pieced Variations. Maar omdat ik hier wat meer ruimte heb, geef ik hier nog wat meer informatie.
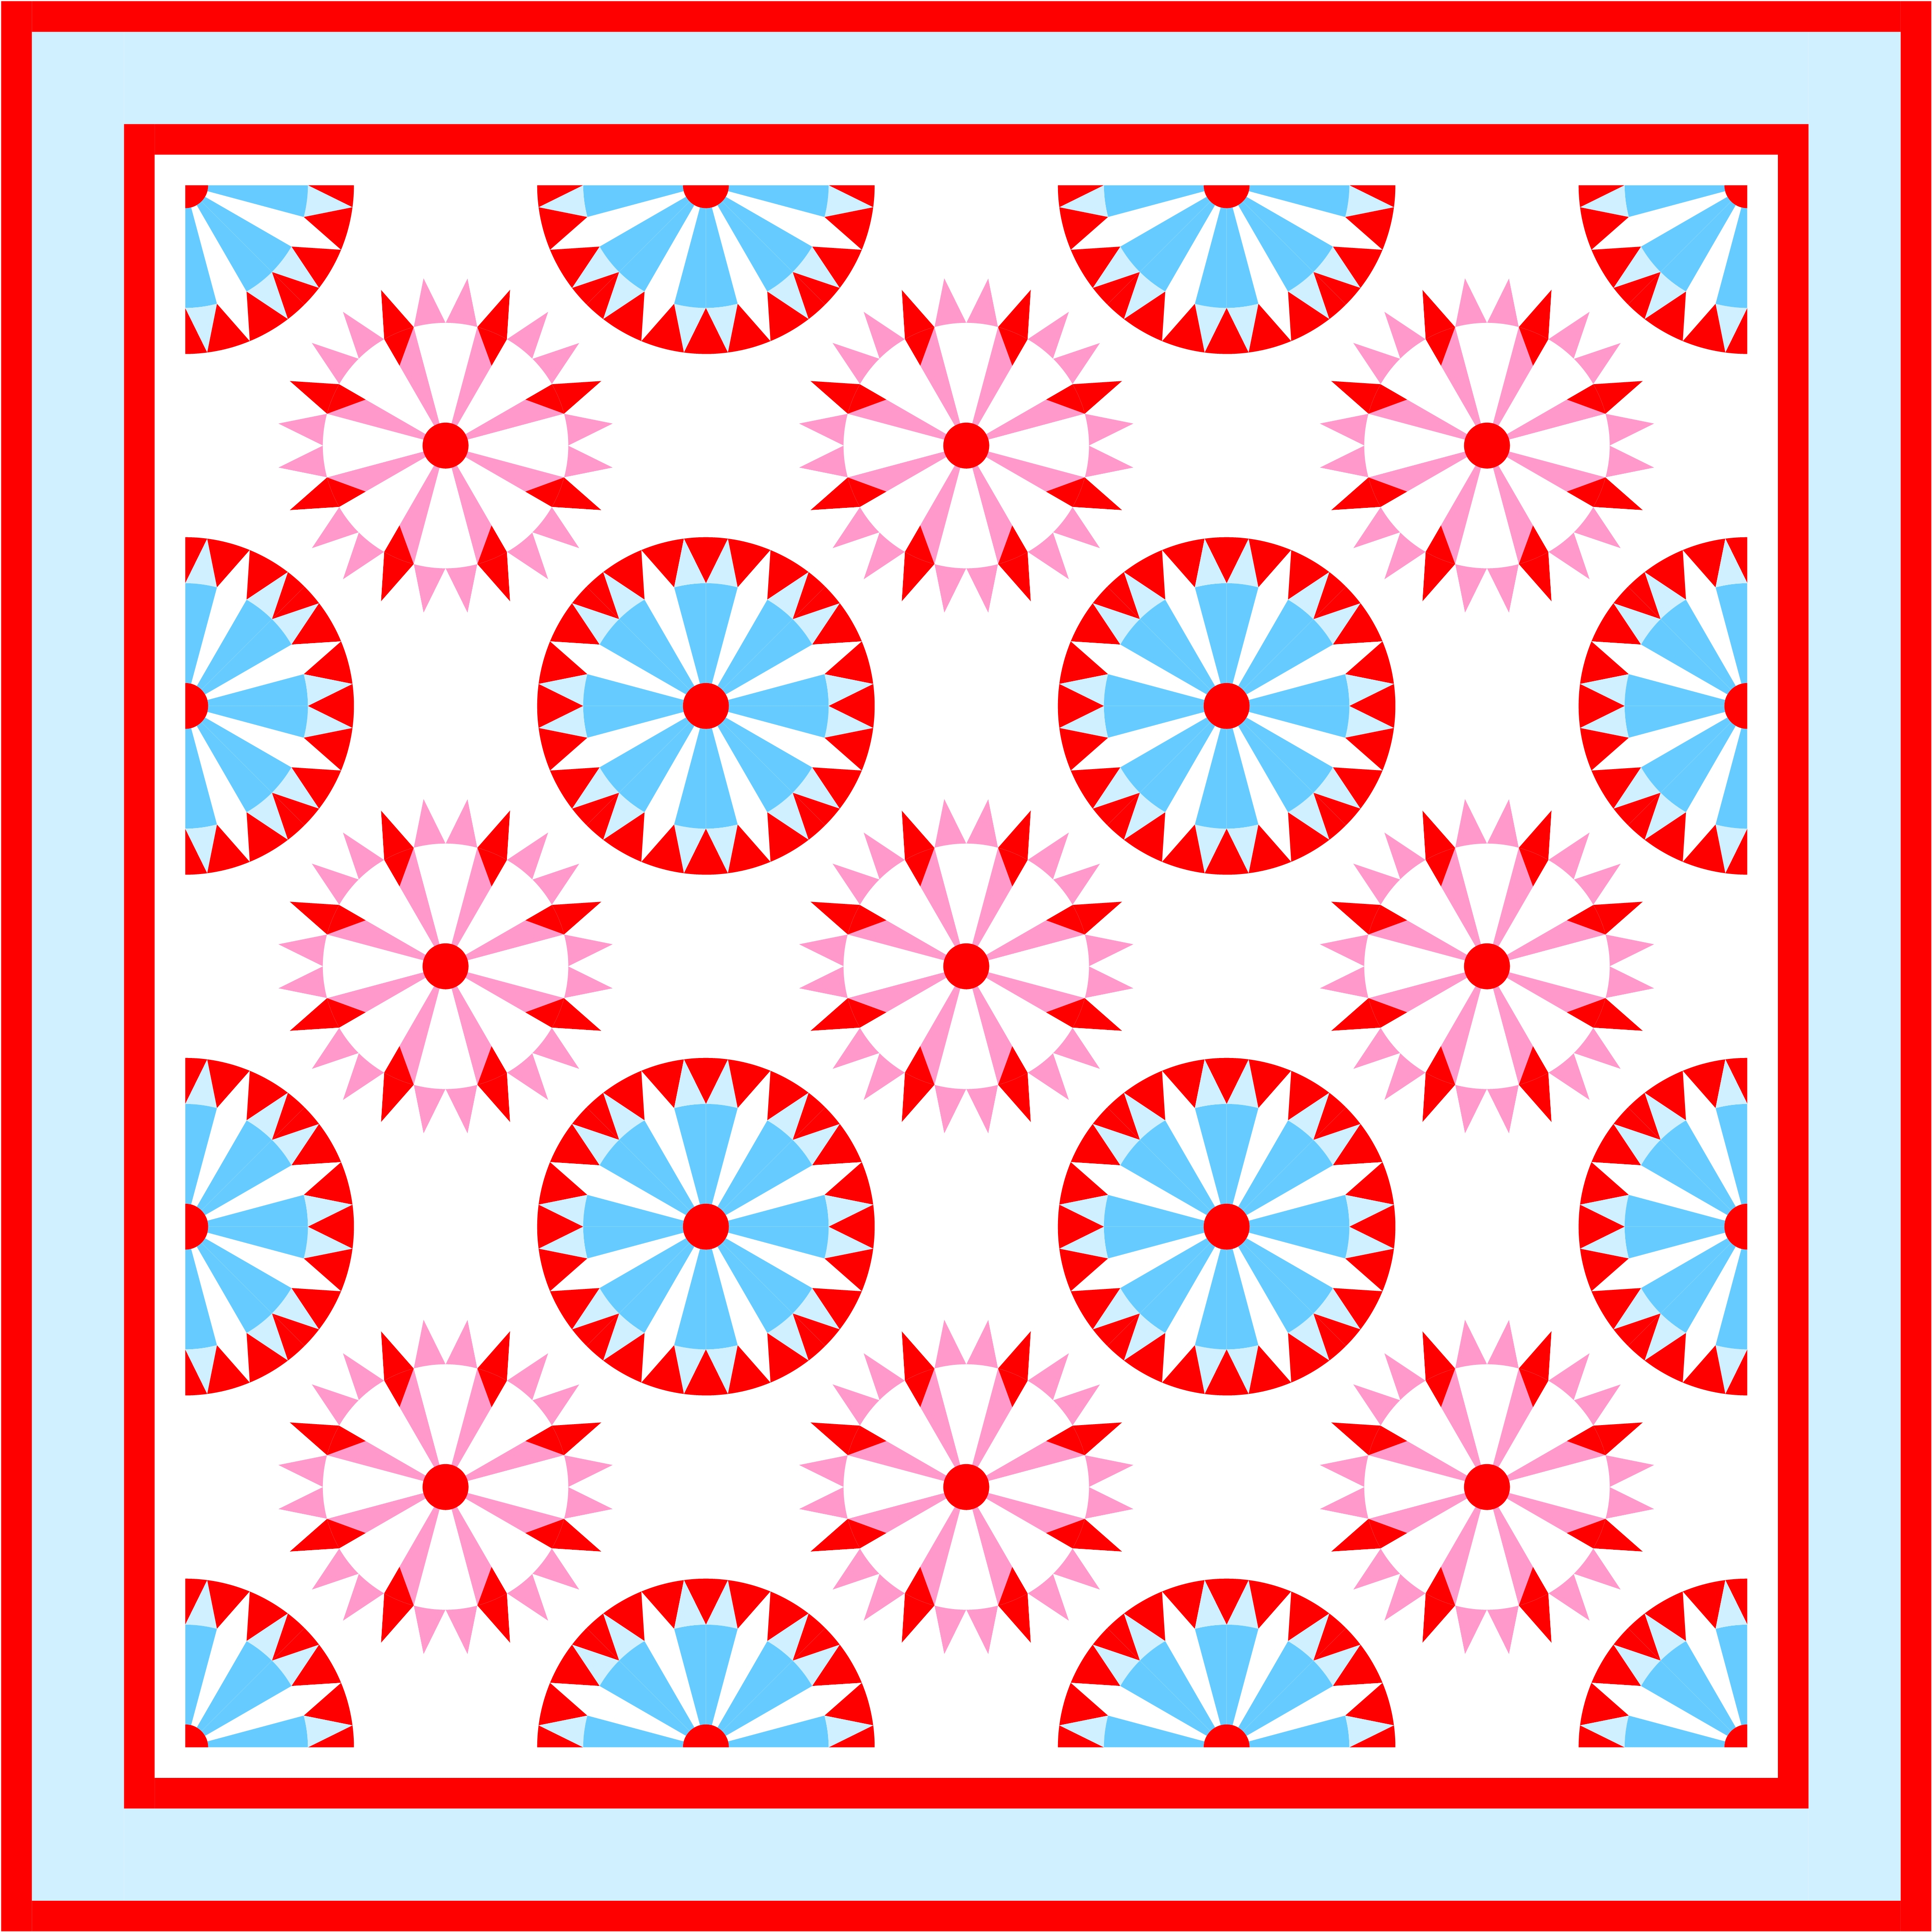
Dit blok is 15 inch [38,1 cm.], en het bestaat uit vier identieke kwart blokken. Door ze allemaal op een andere manier te maken kon ik mooi wat dingen uitproberen en vergelijken.

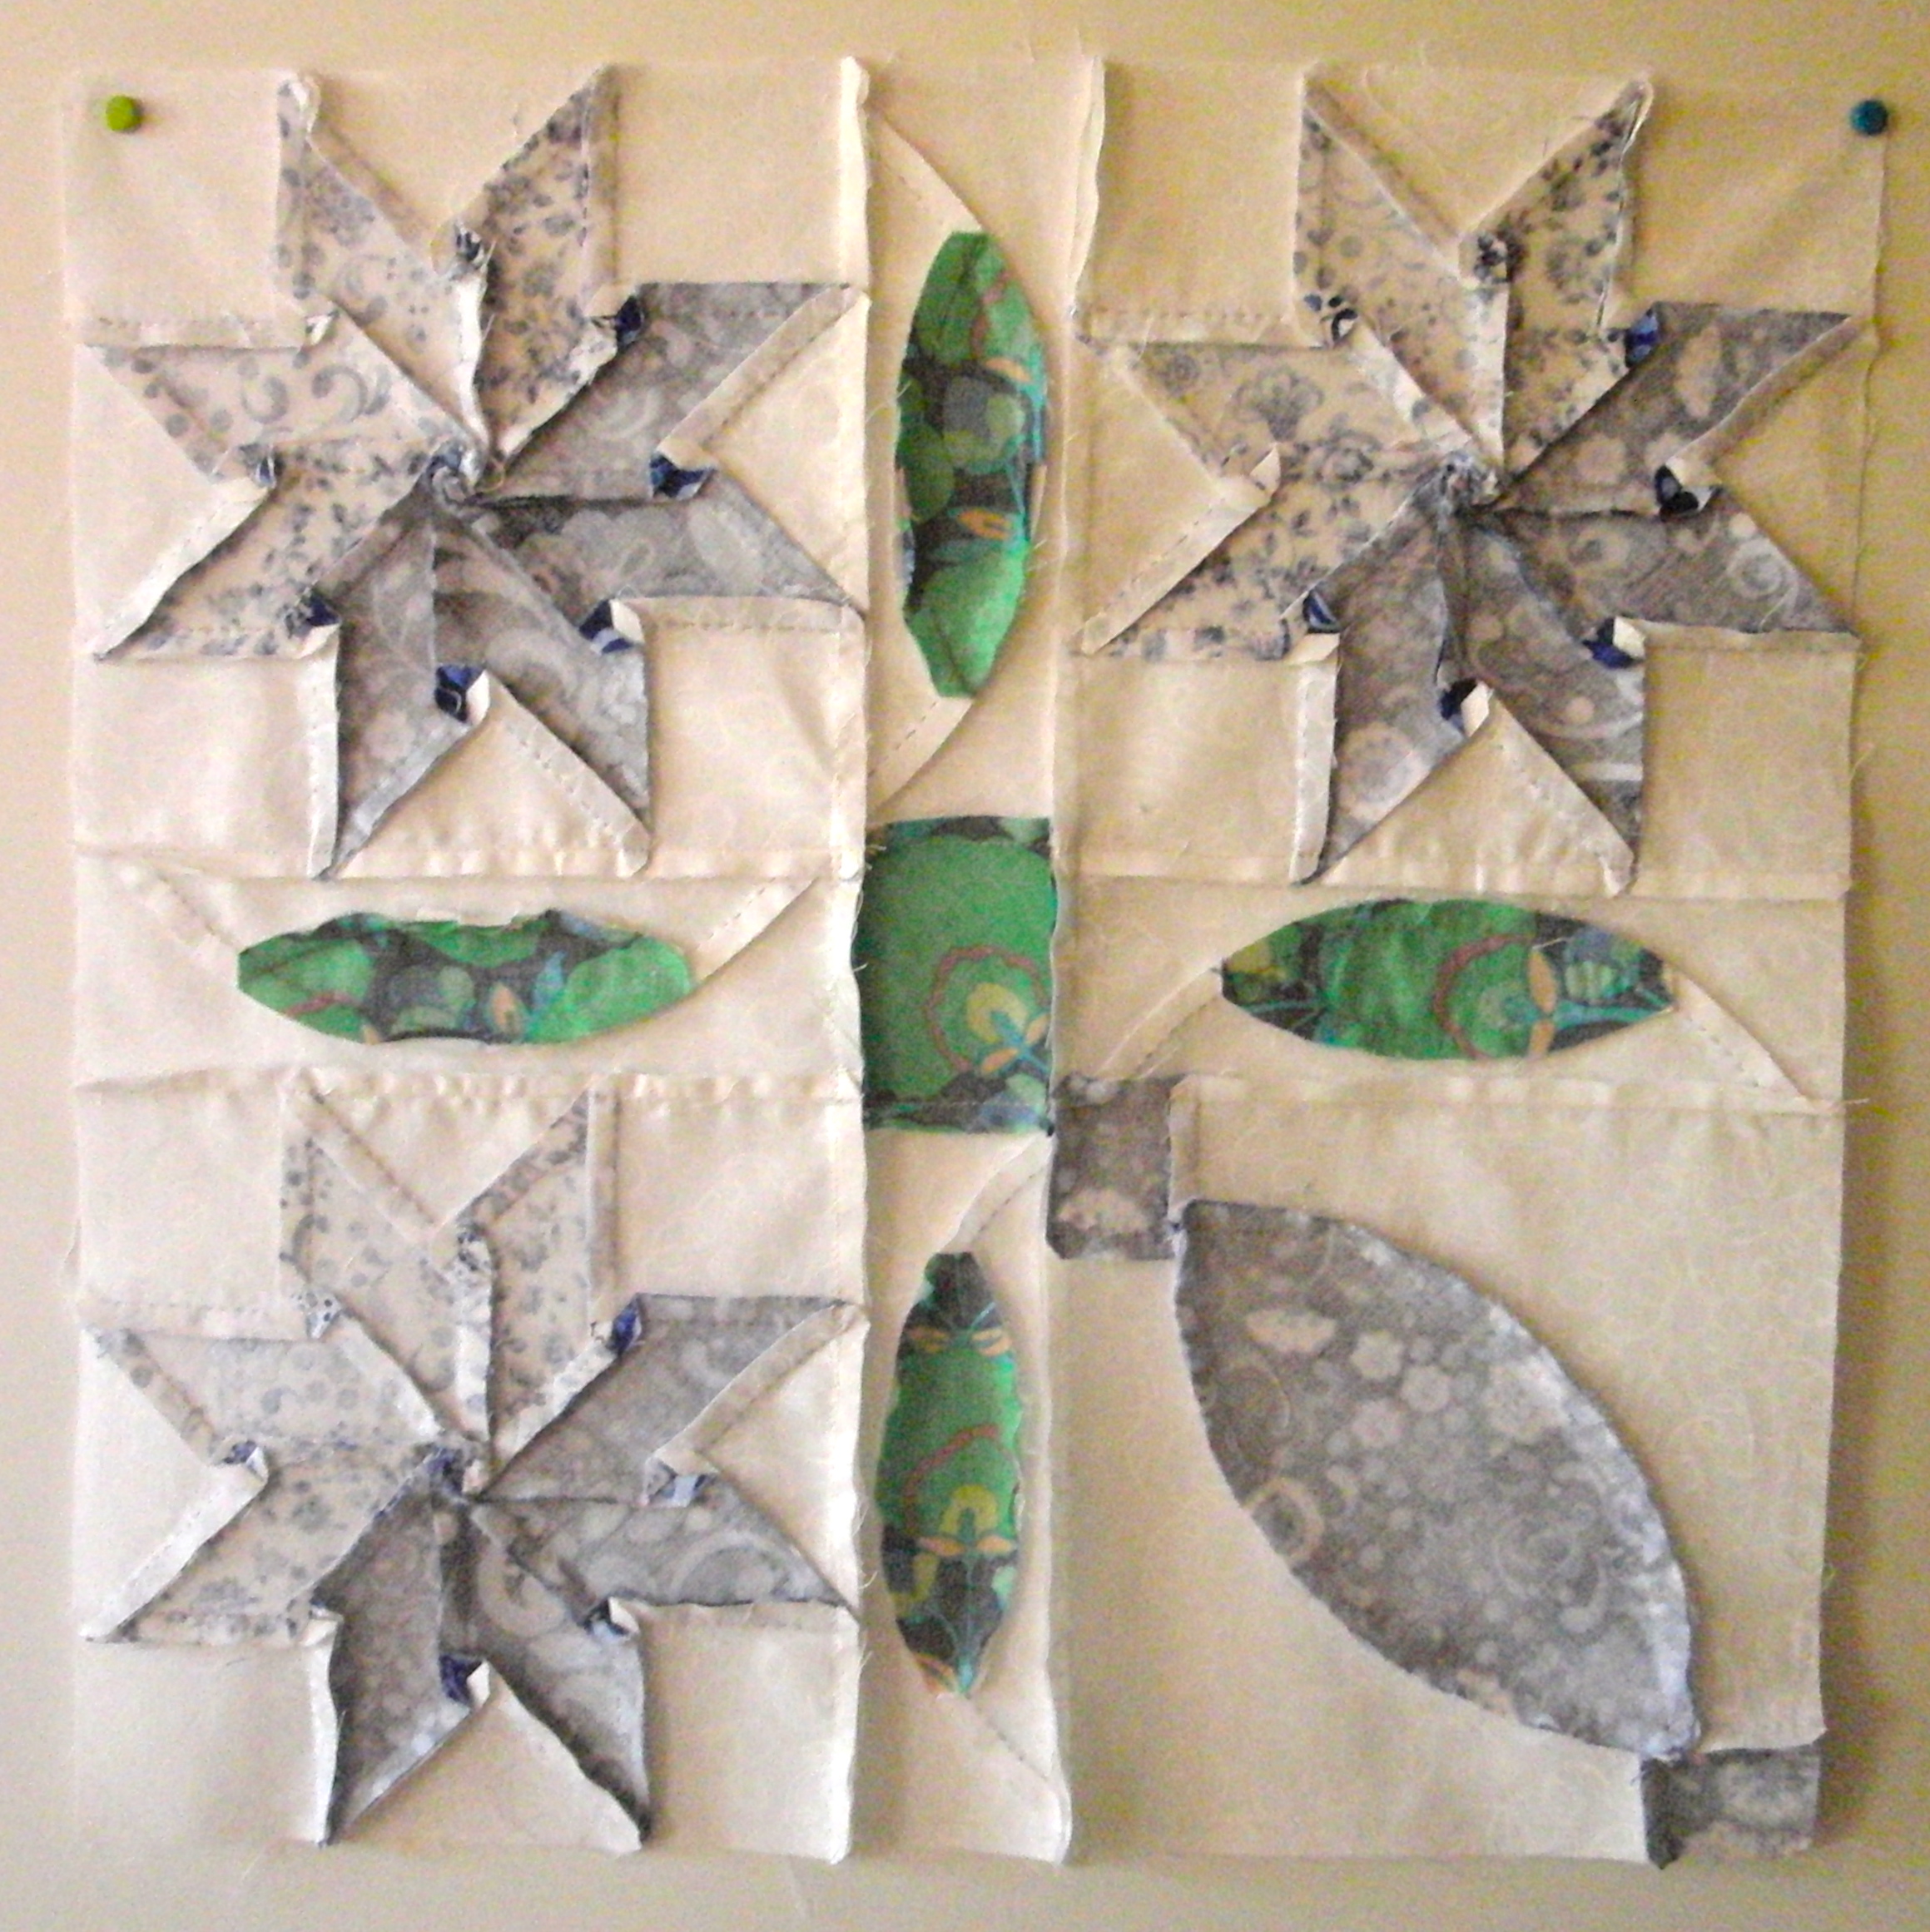
Achterkant van het blok, bijna af
Aan de achterkant van het blok kun je zien dat ik de kwart blokken verschillend gemaakt heb. Het deel linksboven heeft aan de ronde naden bijv. geen papieren naadtoeslag.
Patroon met of zonder naadtoeslag?
Mijn advies: Print je foundation patronen met een kwart inch naadtoeslag rondom.
Door o.a. Karen K. Stone en Jacqueline de Jonge (Be Colourful), zeer ervaren paper piecers en quiltleraren, wordt aangeraden om (in elk geval voor het op elkaar stikken van ronde patroondelen) je foundations zonder naadtoeslag te nemen. (Je stoffen patroondelen hebben uiteraard wel voldoende naadtoeslag.) Dit omdat het naaien van een ronde naad makkelijker zou zijn zonder de extra dikte van het papier.
Maar ik vond het naaien juist lastiger zonder de naadtoeslag op papier. Het zal wel persoonlijke voorkeur zijn, en mogelijk ook mijn gebrek aan ervaring. Het is natuurlijk ook afhankelijk van de ronding van de naad, en van je foundation materiaal, dus ik raad je aan te testen welke naaimethode jou het beste bevalt.
Maar als je je patronen print met naadtoeslag, kun je die er later gemakkelijk afknippen. Achteraf een exacte naadtoeslag toevoegen aan (ronde) patroondelen is lastiger, of onmogelijk, als je je patroondelen al hebt losgeknipt.
Foundation Materiaal

Paper Solvy
Ik heb als foundation materiaal Sulky Paper Solvy, wateroplosbaar papier, gebruikt. Ik had een paar vellen liggen, en dat wilde ik altijd nog eens testen. Voordelen van dit materiaal:
- Het is dun, dat is prettig tijdens het naaien.
- Het kan door de printer, dus je hebt snel een accuraat patroon.
- Je spoelt het uit met koud water i.p.v. dat je het moet losscheuren na het naaien.
- Dat bespaart je:
- Een vervelend klusje
- Een heleboel tijd
- Het risico op vervormen van je stof, vooral van lapjes die schuin-van-draad zijn.
- Het risico van het ongewild lostrekken van stiksels.
Het is mij goed bevallen, maar het is wel een beetje duur als je het gebruikt voor een hele quilt.
Zoals je op de foto kunt zien heb ik geen wateroplosbaar papier gebruikt voor de achtergronddelen. Mijn wateroplosbare papier was namelijk op.
Voor de achtergronddelen heb ik freezer paper (FP) als foundationmateriaal gebruikt. Het patroon voor het achtergronddeel heb ik 2x (met naadtoeslag) op een vel FP geprint. Die heb ik uitgeknipt en op de stof gestreken.
Vervolgens heb ik de stof heel exact om het patroon heen uitgeknipt. Daarna heb ik de patronen van de stof afgetrokken, en het strijken en knippen herhaald voor de andere twee achtergronddelen.

FP, vellen van Jenkins, rol van Reynolds
Voordelen van FP als foundation materiaal zijn o.a.:
- Ik heb het altijd in huis (omdat je het nodig hebt voor Inklingo).
- Het kan door de printer.
- Het hecht tijdelijk aan de stof door te strijken (dus geen spelden nodig, en je stof blijft schoon).
- Patroondelen van FP kun je meerdere malen opnieuw gebruiken, (als je tenminste niet door het papier heen stikt).
- Het is goedkoper dan wateroplosbaar papier.

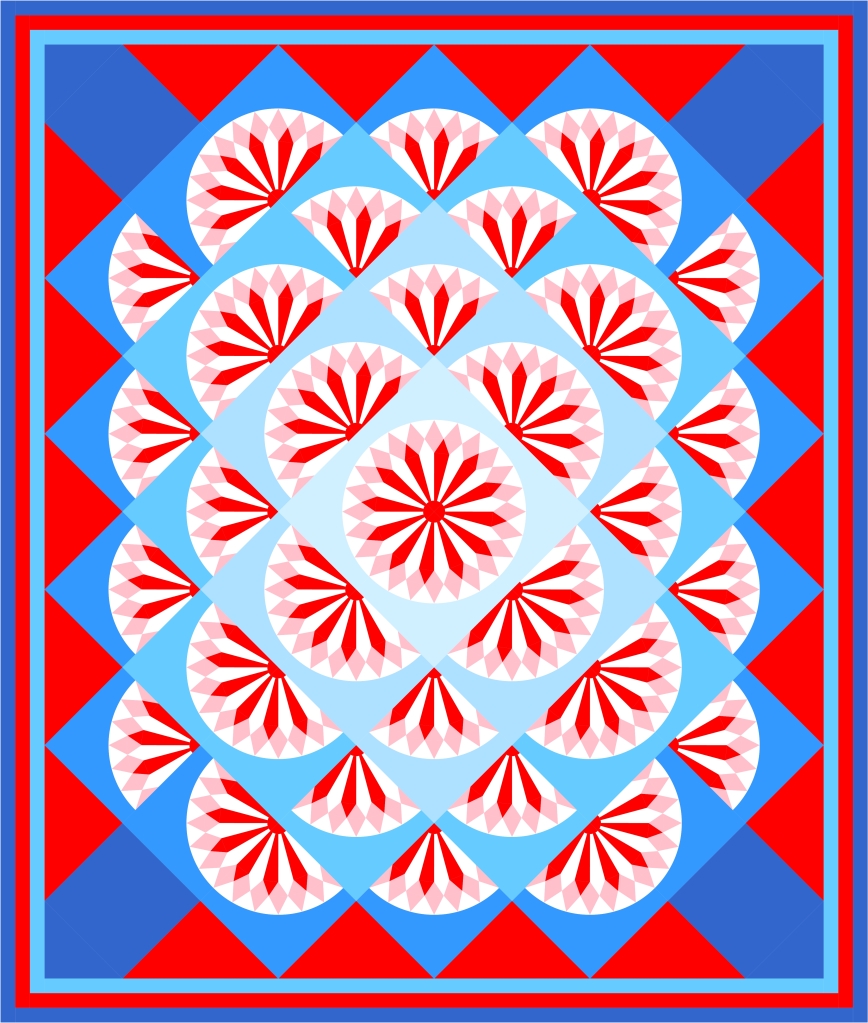
Blok 11 zoals hij in de My EQ Boutique patronencollectie zit
Snijden van de stof
Tip! Snijd je stoffen voor het foundation piecen in repen. Voor dit patroon kun je alle repen van gelijke breedte nemen.
Repen snijden van allemaal gelijke breedte is veel sneller en gemakkelijker dan alle patroondelen eerst aftekenen met voldoende naadtoeslag, en daarna stuk voor stuk netjes uitknippen.
Het werken met repen maakt het ook eenvoudig om je secties in een ketting te naaien (chain piecing). Dat werkt efficiënt en tijdbesparend, als je tenminste zeker weet dat je alles goed doet. Ik raad je daarom aan altijd eerst een (kwart) proefblok te maken voordat je gaat chain piecen.
Ik heb mijn stoffen (behalve de achtergrondstof) in repen van 2 inch [ca. 5,1 cm.] breed gesneden, over de langste zijde van mijn lap.
Let op! Als jij je patroon op een andere maat uitprint, dan moeten je repen natuurlijk ook breder of smaller zijn dan 2 inch.
Mijn repen waren niet allemaal even lang, dat hoeft ook niet. Ik heb resten gebruikt, stukken van hele meters, en fat quarters, die samen ruim voldoende waren voor één blok. Ik ben gewoon begonnen met een paar repen snijden van elke stof, en heb bijgesneden wanneer dat nodig was.
Omdat dit een proefblok was heb ik vrij veel moeten uithalen, en daarmee stof verknoeid. Ik zou dus niet kunnen zeggen hoeveel stof (repen) je nodig hebt voor één blok.
En, omdat je My EQ Boutique patronen op elke gewenste maat kunt afdrukken, zul je zelf moeten inschatten hoeveel stof je nodig hebt voor jouw maat blok.

Ring-met-driehoekjes-sectie, achterkant, vóór het bijsnijden van de ronde naadtoeslagen – De papieren foundation is in de naadtoeslagen helemaal rondom vastgestikt aan de stof
Foundation piecen van de cirkel
Tip! Knip je kleurvoorbeeld van het blok in losse secties, en kijk tijdens het naaien alleen naar de juiste sectie.
Tip! Houd tijdens het naaien consequent dezelfde kant (hol of bol) van je foundations van je af, om te voorkomen dat je je kleurvolgorde in de verkeerde richting naait.
Met drie of meer kleuren, kan het naaien van de juiste kleurvolgorde verwarrend zijn. Ik heb zelf meermaals stukken van de ringen met driehoekjes moeten uithalen, doordat ik:
- Mijn foundation verkeerd om had liggen t.o.v. van mijn plaatje met kleurvoorbeeld, of
- Op het voorbeeld keek naar de verkeerde ring met driehoekjes.
Met bovenstaande tips kun jij dat voorkomen. Leg je kleurvoorbeeld dus ook altijd in dezelfde richting als je foundation patroon.
Nou, het was al best veel info, en er komt nog meer! In een (of meerdere) volgende post(s):
- Beginnen met naaien
- Naaien op of naast de patroonlijnen?
- Persen en bijsnijden van de naadtoeslagen
- Verder met naaien van de rechte naden
- Aan elkaar naaien van twee secties (ronde naden)
- In elkaar zetten en afwerken van het blok
- Quilten
- Binden
- Etiket
- Ophangringetjes
XXX Annika
ENGLISH
In this post I promised to tell you more about how I made my sample block for my My EQ Boutique patterns, and what I have learned, while doing that.
Illustrated sewing instructions (in English) are included in the My EQ Boutique collection of block patterns Inklingo Dresden Plate Pieced Variations. But because I have more space here, I will give some more information here.
Backside of the block, almost finished
This block measures 15 inches, and it is made of four identical quarter blocks. Making them all in a different way gave me the opportunity to test and compare a few things.
The backside of the block shows you that I made the quarters differently. The part in the top left has no paper seam allowance in the curved seams, for instance.
Pattern with or without seam allowance?
My advice: Print your foundation patterns with a quarter inch seam allowance all around.
Karen K. Stone and Jacqueline de Jonge (Be Colourful), very experienced paper piecers and quilt teachers, recommend to use foundations without seam allowance (for joining curved seams, at least). (Of course your fabric shapes will have sufficient seam allowance). This because sewing a curved seam would be easier without the added bulk of the paper.
I, however, found piecing more difficult without the paper seam allowance. It is probably a matter of personal preference, and possibly my lack of experience. And of course it would depend on the curve of the seam and your foundation material, so I recommend you test and see which sewing method you prefer.
If you print your patterns with seam allowance, you can easily cut them off later. Once you have printed, it will not be so easy to add an accurate seam allowance to a curved edge, if not completely impossible, if you have already cut out your pattern sections.
Foundation Material
Paper Solvy
For foundation material I used Sulky Solvy Paper, water soluble paper. I had a couple of sheets handy, and I had been wanting to try these for some time.
Advantages of this material:
- It is thin, which is nice during sewing.
- You can run it through the printer, so you quickly have an accurate pattern.
- You rinse it out with cold water, instead of having to tear it out after sewing.
- That saves you:
- A boring chore
- Lots of time
- The risk of distorting your fabric, especially with bias-grain patches.
- The risk of accidentally ripping out stitches.
I was very pleased with this foundation, but it is a bit pricey if you use it for an entire quilt.
As you can see in the photo of the back of the block, I did not use water soluble paper for the background shapes. That’s because I ran out of it. I used freezer paper (FP) as foundation material for the backgrounds.
FP, vellen van Jenkins, rol van Reynolds
I printed the pattern for the background (including seam allowance) twice on a sheet of FP. I cut them out, and ironed them to fabric.
Next, I cut them out neatly around the pattern. I removed the patterns from the fabric, and repeated the ironing and cutting for the remaining two backgrounds.
Advantages of FP for foundations are (i.a.):
- I always have it in stock (because you need it for Inklingo).
- You can run it through the printer.
- It bonds with fabric temporarily by ironing (so no need for pinning, and it leaves your fabric clean).
- Patterns are reusable several times (provided you avoid stitching through the paper).
- It is cheaper than water soluble paper.
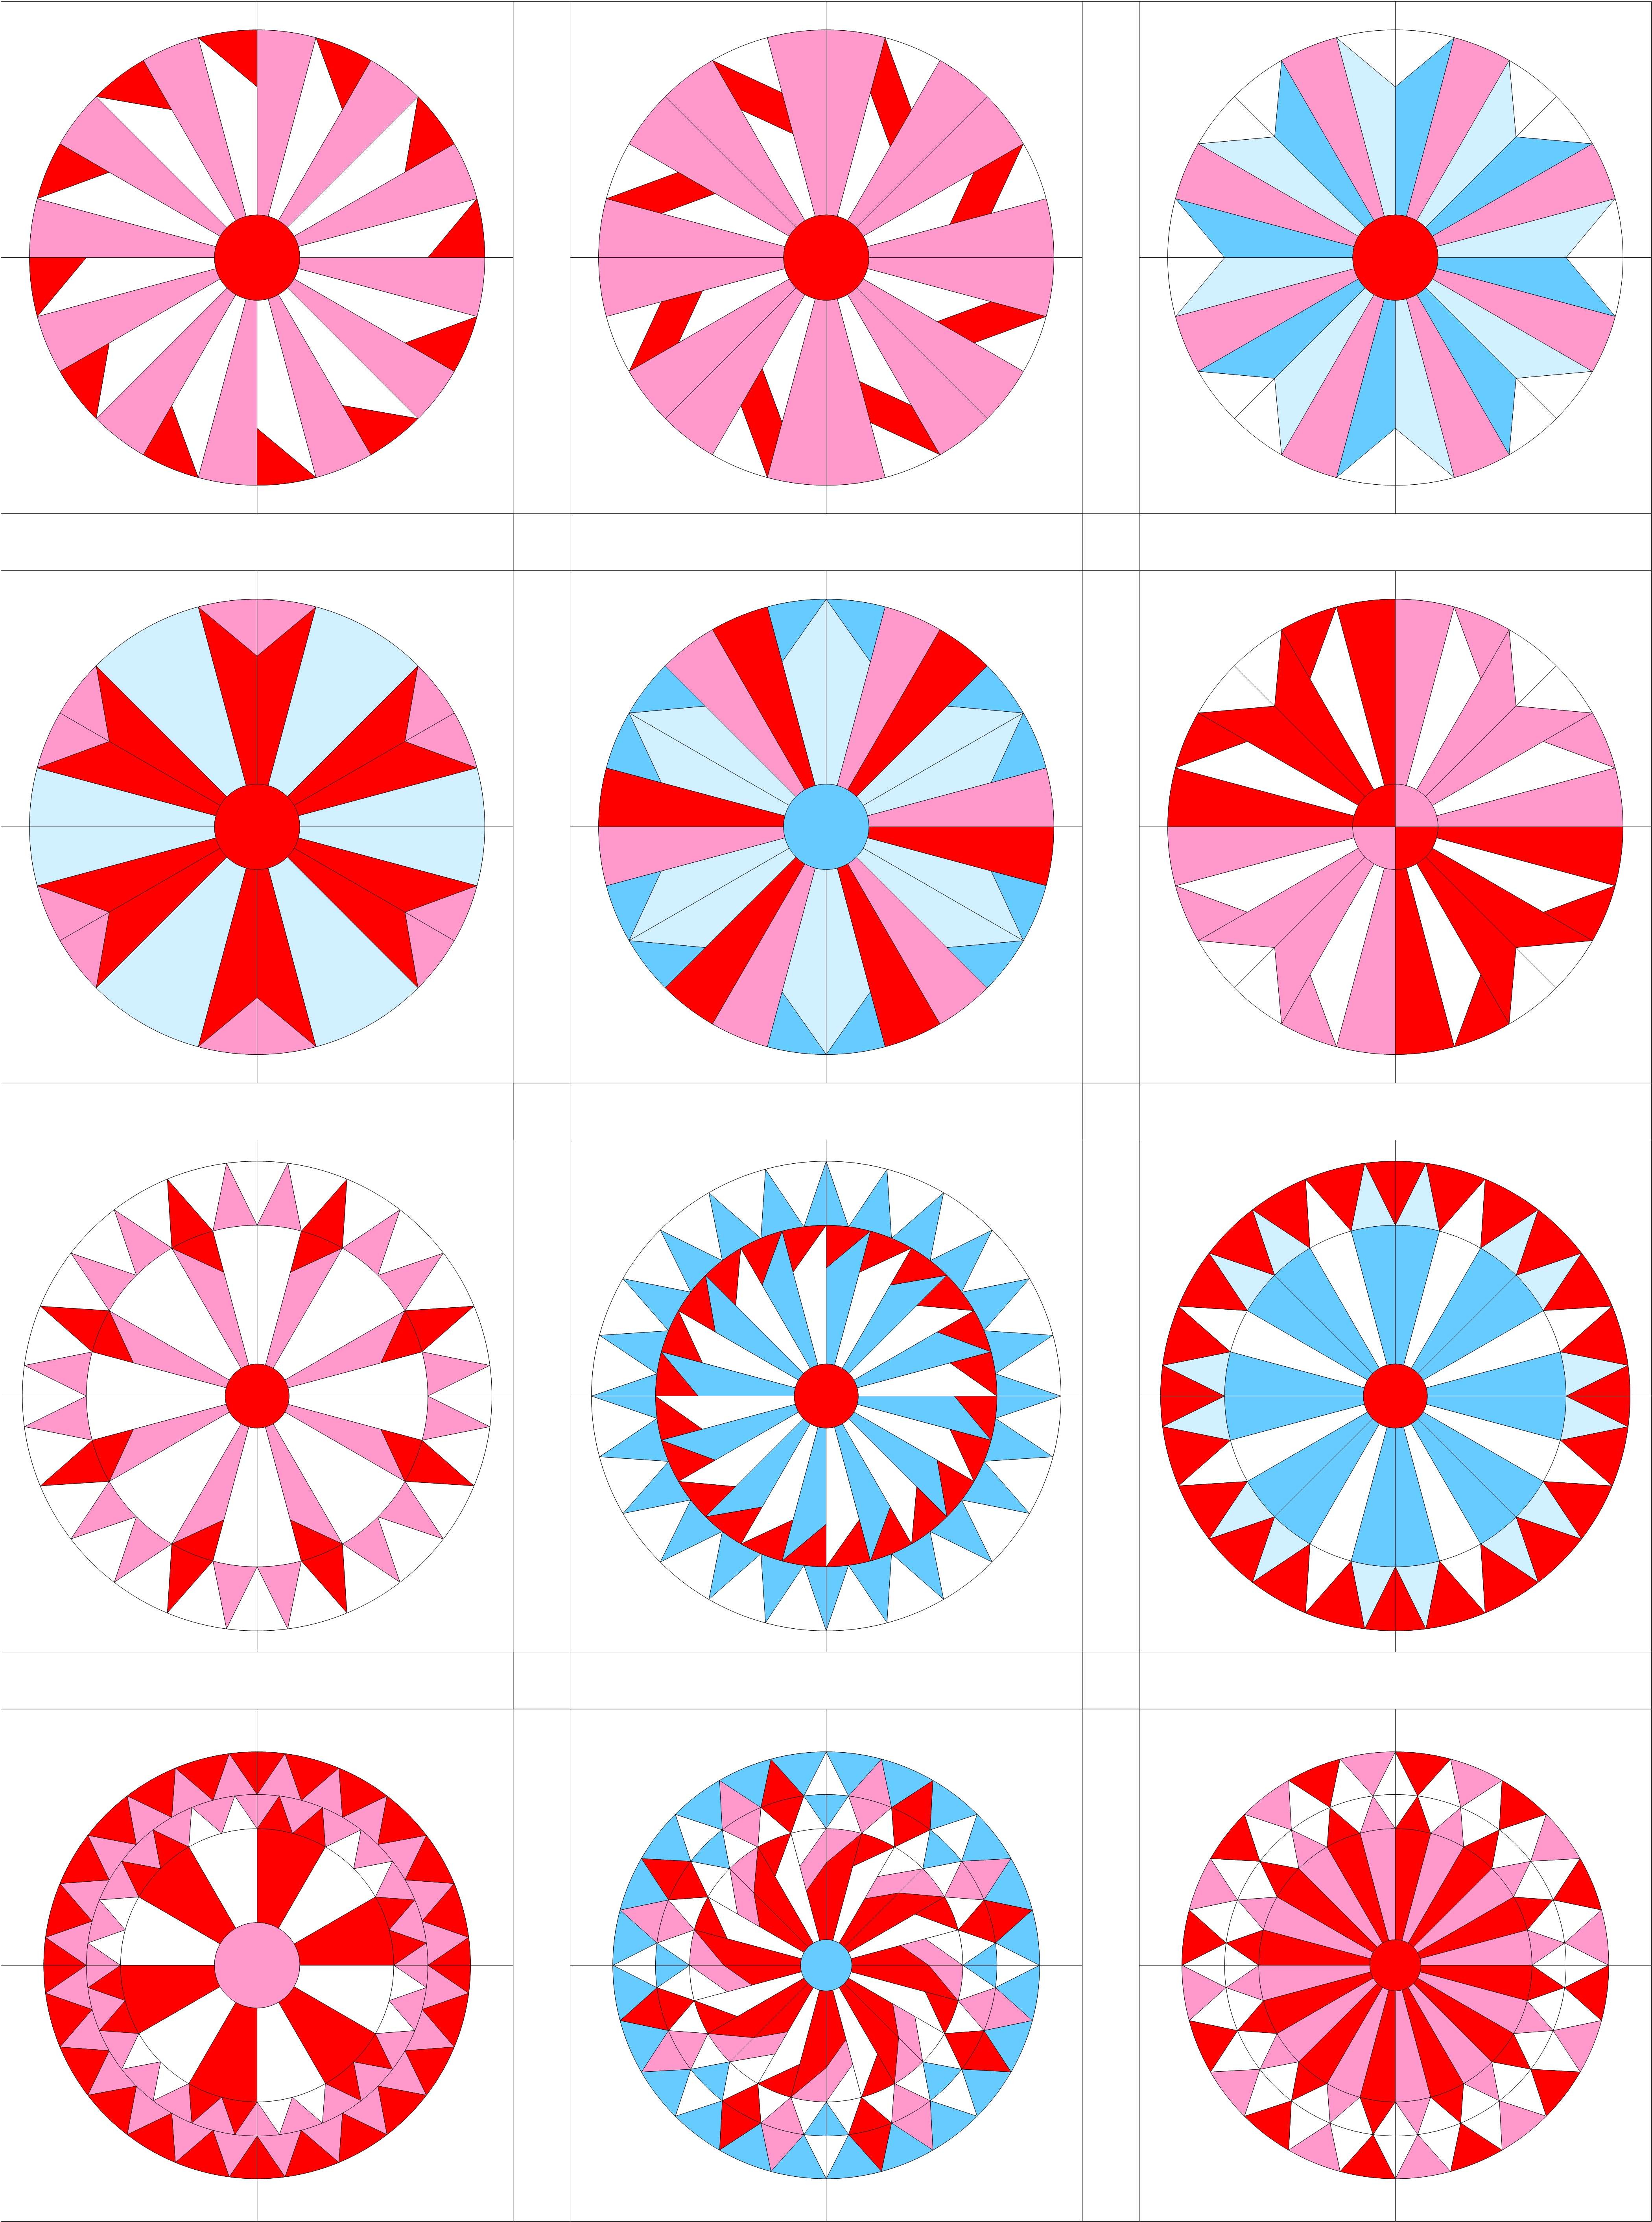
- Block 11, as it appears in the My EQ Boutique block pattern collection
Cutting the fabric
Tip! Cut your fabrics for foundation piecing in strips. For this pattern you can make all strips of equal width.
Cutting strips of equal width is much easier and quicker than marking all your shapes separately with seam allowance, and then cut them out piece by piece, along the marked lines.
Using strips also makes chain piecing your sections easy. This is efficient and time saving, as long as you are sure you sew everything correctly. That is why I recommend to always make a test(quarter) block first, before starting to chain piece.
I cut my fabrics (except the background fabric) in 2 inch wide strips, along the longest side of my piece of fabric.
Note! If you print your pattern at a different size, your strips need to be wider or less wide than 2 inches.
My strips were not of equal length, there is no need. I used scraps, yard pieces and fat quarters, all ample fabric for one block. I just started cutting off a few strips of each fabric, and cut more when necessary.
Because this was a test block, I had to do quite a bit of ripping, and wasted fabric that way. So I could not tell you how much fabric you need for one block, using strips.
Also, because you can print My EQ Boutique patterns at any size, you will have to figure out the amount of fabric you need for your block size.
Triangle ring section, back side, before trimming the seam allowances of the curved edges. – Note the foundation paper is stitched to the fabric all around the outside edges of the seam allowances.
Foundation piecing the circle
Tip! Cut up your color reference block in separate sections, and only keep the section you are sewing handy for reference.
Tip! Always keep the same side of your foundations (concave or convex) facing towards you, to prevent sewing your color sequence in the wrong direction.
With three or more colors, foundation piecing the right color sequence can be confusing. I have had to rip out pieces of the triangle rings several times, because I:
- Had my foundation facing the wrong way compared to my colored block picture, or
- Was referring to the wrong ring with triangles in my example.
If you apply the tips above you can avoid that. So, always remember to also put your colored block picture in the same direction as your foundation pattern.
Well, this was already a lot of information, but there is more to come! In a (or more) following post(s):
- Starting the piecing
- Sewing on or next to the pattern lines?
- Pressing and trimming the seam allowances
- Continuing piecing the straight seams
- Joining two sections (curved seams)
- Assembling and finishing the block
- Quilting
- Binding
- Label
- Hanging rings
XXX Annika