New Inklingo Shapes: Tulip Patch

Tulip Patch Quilt – Original 8 inch [20,3 cm.] Block set on Point, with sashings. Original quilt design by Annika Kornelis

Linda Franz released a new Inklingo shape collection, perfect for Spring! It is the classic Tulip Patch. In my quilt designs, it may look like appliqué, but it is entirely pieced!

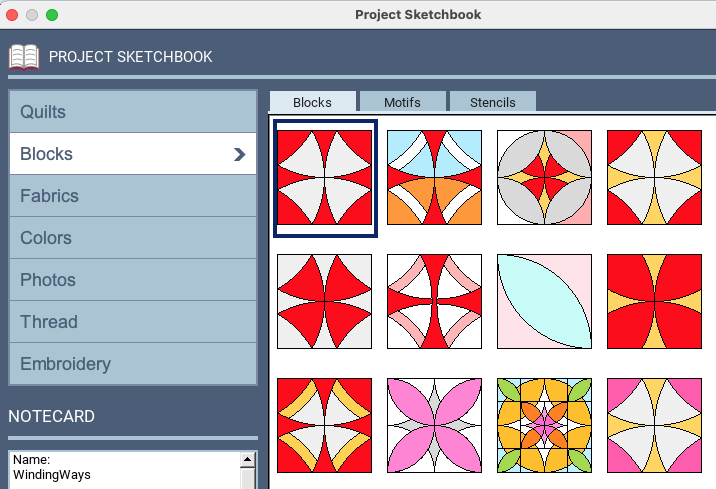
I traced a picture of the block in EQ8, to play with quilt designs. My EQ block is not entirely symmetrical, so it isn’t accurate, but good enough for design purposes.

It’s a very nice block for hand piecing or hybrid piecing (meaning, I would not want to piece the inset seams by machine). Linda has provided a great illustration of the piecing order in the shape collection, and proved machine piecing this block is absolutely doable, even for a 12-year old beginner! Well, I am in awe of this young man!

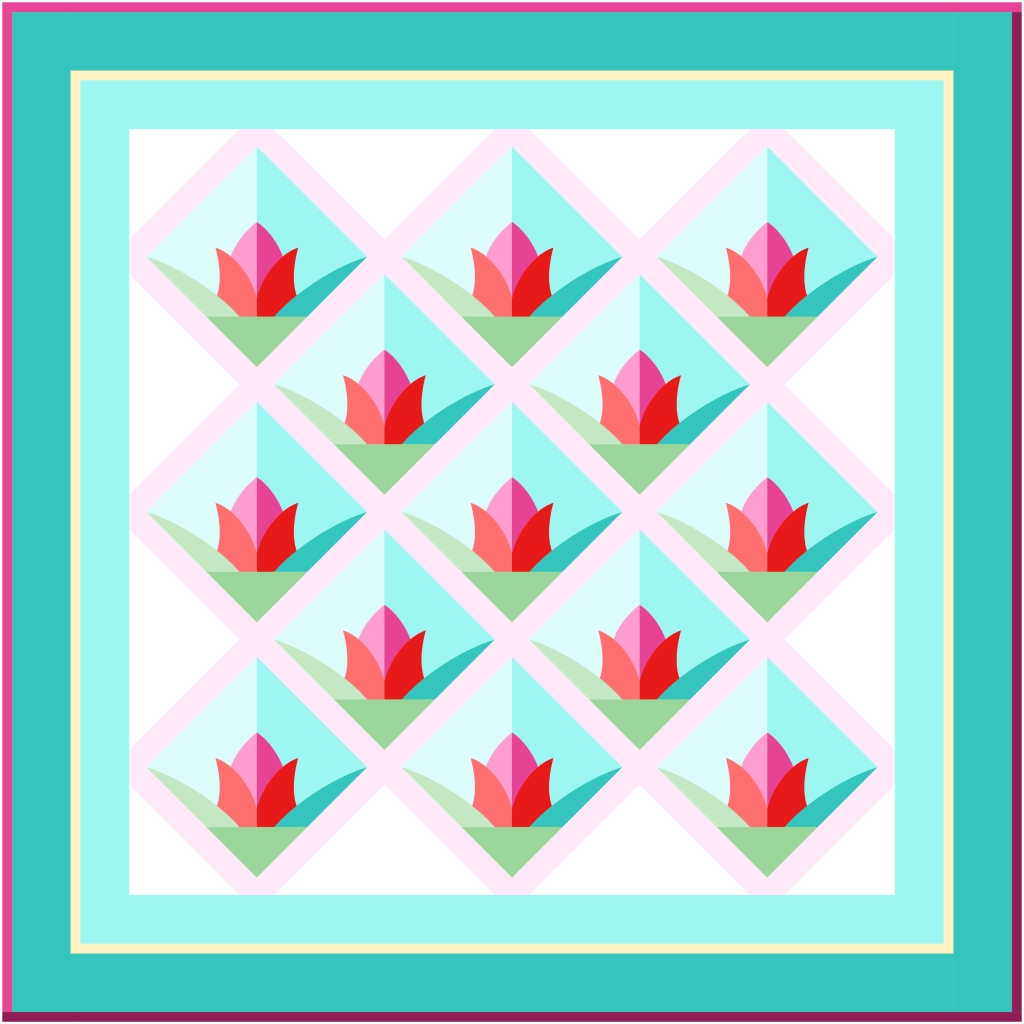
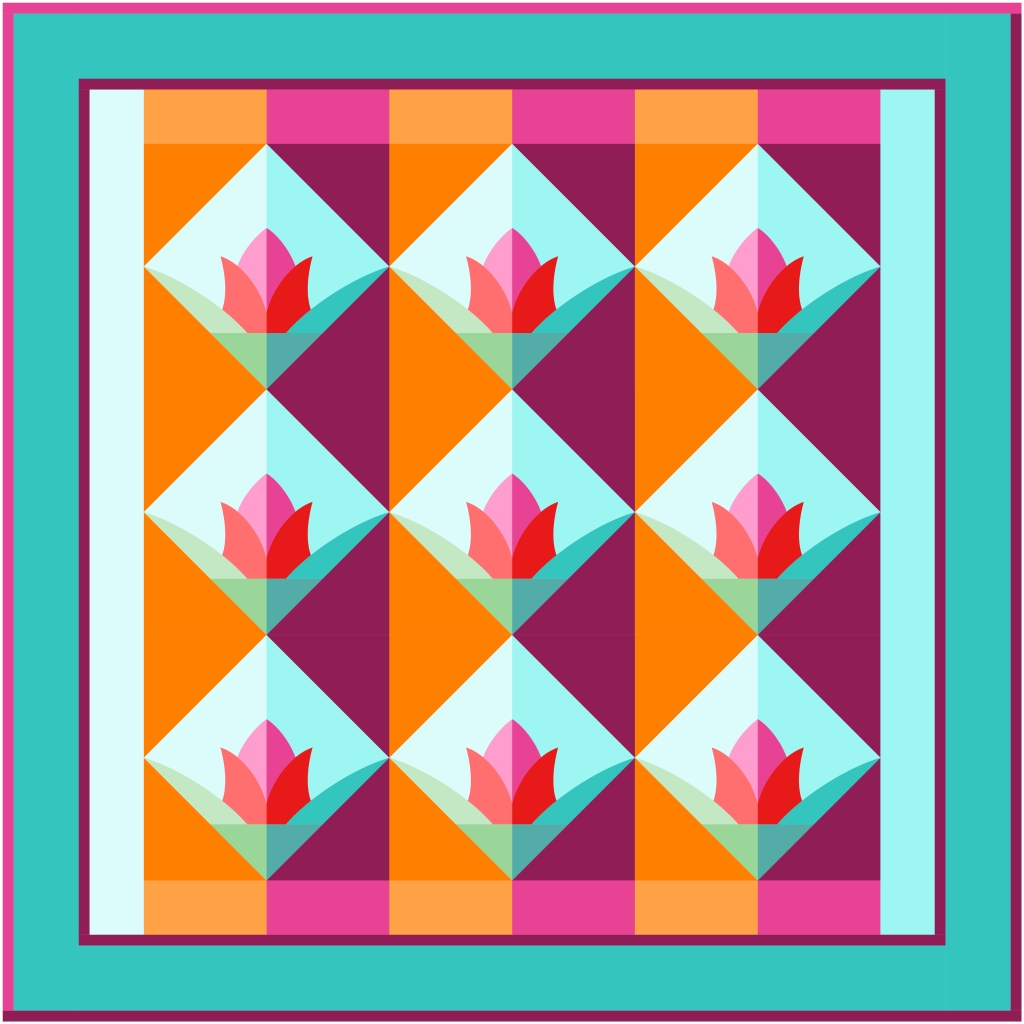
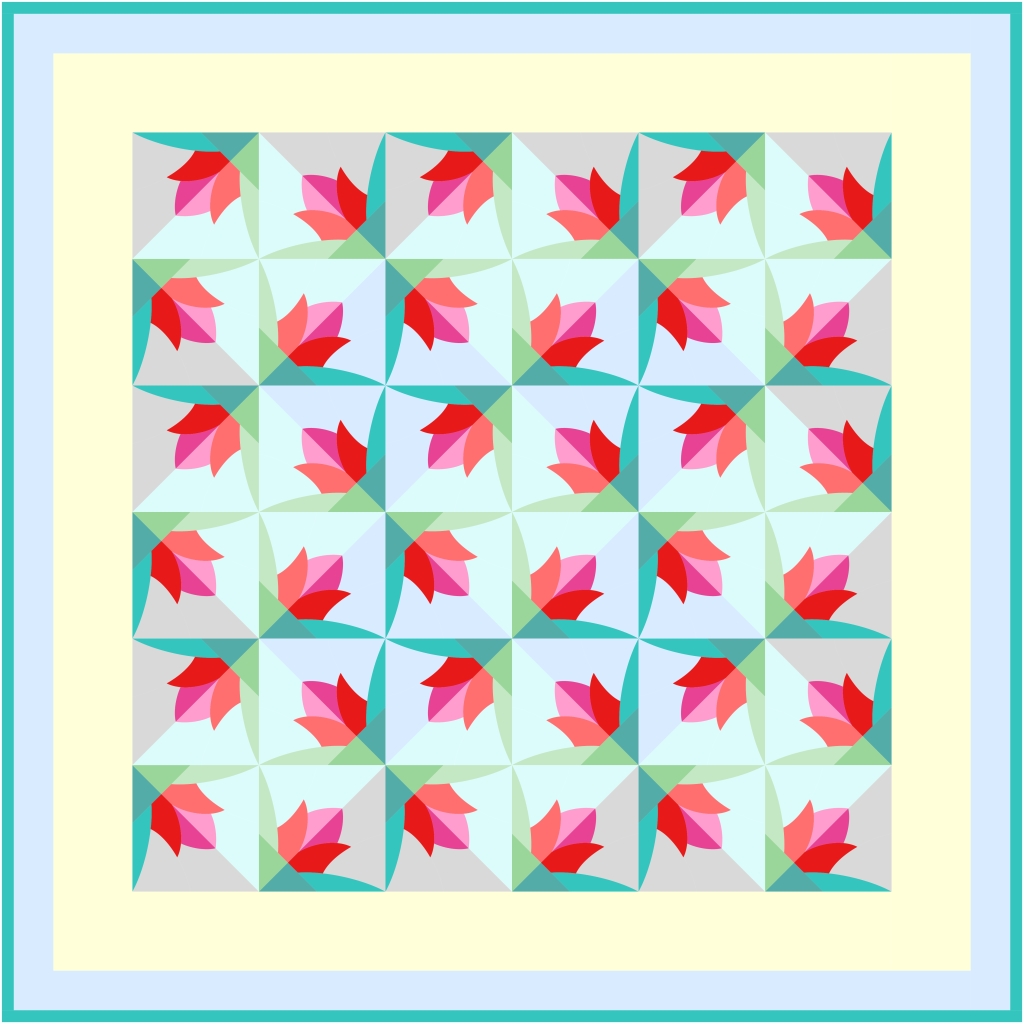
I hope to inspire you with some pretty pictures of quilt designs with this block. I took a liberty and drafted a variation block, too. Can you spot what I added in the picture below?

Tulip Patch Variation Block Quilt (added seam line in Triangle F) – original quilt design by Annika Kornelis

From a coloring point of view (not the piecing point of view), it made sense to me to add a seam line in the ‘bottom triangle’. It allows for transparency effects, and playing with light and dark. Now, these half triangles F are not actually in the shape collection. Looking at a picture of the 8 inch [20,3 cm.] block, I am guessing triangle F is about a 3.75 inch half square triangle (HST). To split it and still have straight of grain on the outside, you would need two 3.75 inch quarter square triangles (QST’s.)

In the index of Inklingo shapes I found several Inklingo shape collections with 3.73 inch QST’s. Depending on the accuracy of my estimated size, it could be usable (or it could be too small).

The next bigger size QST available as Inklingo shape is 4.24 inch. That really is too big, but you could always use them if ‘necessary’. Just piece them together, line up the center seams with the rest of the pieced block, and trim the outside of the block afterwards.

Tulip Patch Variation Blocks – straight set – alternated with Flying Geese blocks – Original quilt design by Annika Kornelis
Tulip Patch Variation Block – straight set – Original quilt design by Annika Kornelis

Well, I hope this put you in the mood for sewing Spring Quilts! The shape collection has a special introductory price until 28 of March 2024.

And Linda is even offering a flash sale of her wonderful book ‘Winding Ways – Quilting the Inklingo Way’, for both the download and the hard copy version. It is a great resource for every quilter, and especially with the Tulip Patch shape collection. The book has great tips and includes sewing instructions for piecing curves.

XXX Annika

Two More Five Point Star Quilt Designs

I promised you more quilt designs with the latest Inklingo shape collection, the 4″ Five Point Star blocks.

Today I am showing you two designs which have a more modern look than the previous designs, which look more traditional / vintage.

Five Point Star Minimalist Christmas Tree – Original quilt design by Annika Kornelis.

I designed this quilt to use pieced blocks, but of course you could applique circles with five point stars on top. The 4 inch blocks are set with sashings of different sizes, to get the right elongated shapes for the tree above and the heart below.

In the tree quilt design, I set Width (vertical sashings) to 0 in EQ, and Height (horizontal sashings) to 2.250 inch. In EQ, I set the Left and Right Borders (9 inch) to a different width than the Top and Bottom Borders (4.5 inch).

I Love All Stars – original quilt design by Annika Kornelis

For the heart quilt design, I set the sashing Width to 1 inch, and sashing Height to 1.750 inch. The dark borders are 4.5 inch all around.

Next, I have a couple of more ‘folksy’ quilt designs with Five Point Stars coming up.

XXX Annika

Circling Swallows Quilt Designs

Circling Swallows set On Point, with sashings. Striped fabrics are all oriented towards the points of the diamonds. Original quilt design by Annika Kornelis.

Linda Franz did a blog post about sewing Circling Swallows blocks with Inklingo on her All About Inklingo Blog. Everything you need for a 10.84 inch [27,53 cm.] Circling Swallows block is in this Free Shape Collection!

It is wonderful that she included the additional square and QST you need to finish this larger star, which aren’t available to print on fabric, to print on freezer paper for templates!

I wanted to see what this block looks like with striped fabrics, so I drafted the block in EQ8 and played with it. I only found red and blue striped fabrics to my liking in the EQ Libraries, so that determined my color palette.

Circling Swallows in a straight set, different orientation of the striped fabrics. Alternated with striped eight pointed stars. Original quilt design by Annika Kornelis.

In the quilt design above, the bigger stars (3.18 inch / 8 cm.) are not Inklingoable. But, if:

  • You used the 3.06 inch [7,8 cm.] diamonds from the Celestial Star shape collection, and
  • Pieced them slightly outside the printed lines, and
  • Use the freezer paper templates for the QST’s and the squares from the Free Shape collection,

I think you could make it work.

Variation of the quilt design above, straight set, now with a slightly different coloring and added sashings with cornerstones. Original quilt design by Annika Kornelis

I think the orientation of the striped fabrics in the red stars in this last one is more harmonious with the orientation of the stripes in the Circling Swallows blocks.

The orientation of the stripes in the red stars in the design above this one is more dynamic. If I were to add sashings to that one, I wouldn’t also add cornerstones. I think it could become too busy.

Anyway, I have decided I really like striped fabrics for Circling Swallows!

XXX Annika

Winding Ways Book and Quilt Designs

Update 10 May 2021: Linda Franz has issued a new shape collection for Winding Ways, 6 inch DeLuxe. That means that the quilt designs below are all completely Inklingoable now!

On World Book Day, I received a wonderful new quilting book that had traveled the world (from Canada to the Netherlands) to find me!

It is ‘Winding Ways – Quilting the Inklingo Way’ by Linda Franz. It is a beautiful, great reference book for any quilter! It contains so much information which applies to many, many more patchwork designs than Winding Ways.

And it is not just about Inklingo either. With just this book, Linda gives you all the information and the templates to make Winding Ways blocks + special variations in several sizes! (3 inches, 4.5″, 6,” 9 “and 12”).

It is a hard cover book with glossy paper, and it is made with all the love and amazing attention to detail I have come to expect from Linda! Lots of pictures of pretty fabric, fussy cutting, cute pictures of Monkey and many amazing quilt designs.

And of course this inspired me to play with Winding Ways in EQ. (Linda has a free EQ project file to download on her blog, but I drafted my own).

I challenged myself to come up with designs that add something to what’s already in the book. Since there is already so much, my best bet was to combine Winding Ways with shapes from a different Inklingo Shape collection :-). Because of the similarities in curves, I picked the Orange Peel (DeLuxe) shape collection.

EQ8 Project Sketchbook with selection of the blocks I drafted for these designs

The grid/size does not match however. The Winding Ways are multiples of 3 inches, and the basic Orange Peel units are 4 inch (so 4 units make an 8 inch block). So, I ended up with quilt designs that you can make with Inklingo, and some that you can only partly make with Inklingo, because the shapes I used are the ‘wrong size’.

Today I am showing the Inklingoable designs. The rest will follow.

Winding Ways quilt that uses the center ‘bonus shapes’ from the Inklingo Winding Ways Deluxe collections. These wider center shapes create a cross shape going through the center, and make the blocks easier to piece. This is especially useful for the cute 3 inch blocks! It makes the blocks slightly bigger too. This design also uses the bonus shape which is highlighted in the design below. Original quilt design by Annika Kornelis
This looks more like a classic Winding Ways quilt. It also has a twist, created by using one of Linda’s Inklingo bonus shapes (the grey edges on the light petals) from the DeLuxe Inklingo Winding Ways shape collections. Original quilt design by Annika Kornelis.
In this quilt design I combined 6 inch Winding Ways (variation) blocks with 8 inch Alabama Beauty blocks, from the Inklingo Orange Peel Deluxe shape collection. I framed the 6 inch blocks with a 1 inch yellow frame, so everything fits the 4 inch grid. I put 4 inch sashings between the blocks, with 4 inch basic Orange Peel units in the corner stones, creating a sort of beaded trellis pattern. Original quilt design by Annika Kornelis.
This design is using yet another bonus shape from the Inklingo Winding Ways Deluxe collections. The red petals are larger, so they fill the corners of the blocks. You could do this without the bonus shape, but you would have a seam between two red patches. The yellow spikes reminded me of Alabama Beauty, so I elaborated on that in the following design. Original quilt design by Annika Kornelis.
My choice for the border blocks (only available as 8 inch Inklingo blocks) defined the size of the center Winding Ways blocks to be 6 inches. Note that the blue borders are not all the same width, to negotiate the grid difference between 6 inch blocks in the rectangular center and 8 inch blocks in the outer borders. Original quilt design by Annika Kornelis.

Did you know the Winding Ways pattern could be this versatile? And there’s even more! (In Linda’s book now, or on my blog later…)

If you are interested in any of the Winding Ways shape collections, go to Inklingo’s Main Winding Ways page to see which sizes are available. Bonus shapes are in the Deluxe collections. You can find the Inklingo Orange Peel shape collections here.

Read two follow up posts here and here.

XXX Annika

Merry Christmas!

Merry Christmas! I’ve been very busy at work, so my annual tradition of a Christmas quilt on the blog is late. And I know I once said I think Christmas quilts should always have stars… Oh well, 2020 has been such an odd year. My Christmas quilts-without-stars are just one more anomaly…

Santa, Reindeer and Snowman posing as Reindeer – Christmas Quilt, mostly simple piecing. (The eyes could be made using buttons or something). All blocks are my original design, drafted in EQ8. Original quilt design by Annika Kornelis.

I gave myself the challenge to create Santa blocks using only simple shapes. I explored both straight lines and round shapes.

Santa and Albino Rudolph – Christmas Quilt combining applique and piecing. The flower applique block is from the EQ Libraries, the Santa and Reindeer blocks are my original design. Original quilt design by Annika Kornelis.

Santa and Reindeer Variation – Christmas Quilt combining more applique and piecing. The flower applique block is from the EQ Libraries. I used this with the EQ Wreathmaker tool to create the flower wreath in the center. The Santa and Reindeer blocks are my original design. Original quilt design by Annika Kornelis.

Santa and Snowman posing as Reindeer – Christmas Quilt combining applique and piecing. The flower applique block is from the EQ Libraries, the Santa and Snowman blocks are my original design. Original quilt design by Annika Kornelis.

Simple Round Santa – Applique Christmas Quilt. I used a flower applique block from the EQ Libraries and the EQ WreathMaker Tool to create the flower wreaths. The Santa motif is my original design. Original quilt design by Annika Kornelis.

I am sorry, but I am not posting an EQ Projectfile this time. The file is a mess, and I don’t have time to clean it up now. The pieced blocks are drafted in haste, and have extra lines etc. I would really want to make separate Inklingoable versions and Foundation Paper Piecing versions, which would require redrafting all blocks. That’s not really fun :-(

So, I will go relax now in my fleece cat pajamas (saving the Christmas pajamas for tomorrow), and have some of my very special Christmas chocolate bars to really get in the spirit.

Wishing you all a cosy, safe and healthy Christmas, and a very happy, healthy and ‘normal’ 2021!

XXX Annika

Simple Shape Quilt Designs

Half Square Triangles (HST’s), Rectangles, Squares – original quilt design by Annika Kornelis

I am not feeling very creative these days. My creativity feeds off the buzz of city life. Since we are supposed to only go outside if it’s necessary, and many or all shops, restaurants, cafes, theaters, museums and offices are closed, there is no buzz. There is hardly any city life. It’s sad.

So while I am not brimming with creative ideas, I do feel the need to play with color, and make nice things I can share. I figured I would design quilts with repeating basic units, in case anyone wants to do fairly random piecing to keep busy, using just their stash, and without a real pattern in mind.

Many of these basic units can be made with Inklingo shapes. You can find all available shapes and sizes here. Note: Squares and rectangles are under ‘polygons’.

I used mostly existing blocks from the EQ Block Libraries. I hope these pictures give you some ideas of what you can do with piles of, for instance, half square triangle units or flying geese units. Linda Franz gives some great Triangle Tips on her website for quick, efficient and perfectly accurate machine piecing triangle units.

The Five Patch Shoo Fly block on a 5 x 5 square grid

The yellow / orange quilt at the top of the post uses Five Patch Shoo Fly blocks, set side by side, surrounded with grey and yellow sashings, and blue corner stones. This design would work with a controlled scrappy palette too.

All rectangles are the same size, both inside the block and in the sashings. The same goes for the small center squares and the corner stones.

You can see the ratios in the line drawing above. So if a block finishes at 5 inches, the grey sashing rectangles are 1 x 2 inches, with a 1 inch yellow square in the middle.

Triangles and Squares – original quilt design by Annika Kornelis

The second quilt alternates two 4 x 4 grid blocks. One is a Variable Star with an extra diamond in the center. The other is a Dutchman’s Puzzle. Both use the same sizes of triangles, in basically Flying Geese units.

Line Drawing of Variable Star on 4 x 4 square grid

Line Drawing of Dutchman’s Puzzle on 4 x 4 square grid

The larger triangles are all Quarter Square Triangles (QST’s). The smaller ones are Half Square Triangles (HST’s). Let’s assume you want to make these blocks using Inklingo shapes.

The long side of the QST’s are half the width of the block. They are named for the length of this side. The largest ‘regular’ size in Inklingo QST’s is 3 inches. (There are many more ‘odd’ sizes of QST, up to 12.18 inch!).

So let’s say you are making 6 inch blocks (finished size), using 3″ QST’s. You would need the 1.5″ HST shapes for the small triangles. The corner squares in the Variable Star block are also 1.5″. So the ratios are: QST and square 1 : HST 2 : block size 4.

The on point square in the center (or diamond) of the Variable Star has an odd size. The sides are the length of the long side of the HST’s. If its short sides are 1.5 inches, the long side is 1.5 x 1.414 = 2.12. (Thank you, Pythagoras, for figuring out the 1.414!)

And that sort of thing is why Linda Franz of Inklingo has provided us with so many ‘odd’ sized shapes! :-). Thank you Linda, for making 2.12 inch square Inklingo Shapes!

Of course you can pick any size you like for your sashings and corner stones. If you want to use Inklingo shapes, you can use the log cabin shape collections. The largest log available is 1 x 10 inches.

Dutchman’s Puzzle and Variable Star blocks without sashing, different coloring  – original quilt design by Annika Kornelis

Above you can see what you can achieve with the same blocks in a different set. Here they are set side by side without sashings. The different coloring (specifically the black triangles) makes it look like Dutchman’s Puzzle variation blocks in an on point setting, with light grey and red sashings.

Very simple Flying Geese quilt design. Would work in vertical direction too. Original quilt design by Annika Kornelis

Again, for flying geese units with Inklingo shapes, you need QST’s for the larger triangles and HST’s for the smaller triangles. For any size QST, you need half the size HST. Linda names all shapes with the finished size, so you would be looking for say 6″ QST and 3″ HST shapes.

I hope you enjoyed this virtual quilt show!

XXX Annika

Different Easter Chocolate!

Easter Egg Tree in our living room. I left the art card in the picture, because it shows my favorite Fernando Botero painting: The Vatican Bathroom :-).

We have a second similar Easter Egg Tree in our living room, but other than that, no Easter eggs for us this year! No chocolate eggs, no decorated boiled eggs. We almost didn’t have the glass Easter eggs on display either, because until White Thursday, we had been unwilling to remove the Christmas decorations from our trees! (“Christmas trees in April?!” “Yeah, you know, climate change…” ;-))

I made filled eggs, and of course we did not have to go without chocolate. I tried to make eggnog truffles.

Eggnog and chocolate, to start water based ganache

Long story short, I mixed two failed eggnog ganaches (one milk chocolate and one dark chocolate) and we ended up with a delicious chocolate eggnog paste. We spooned some up with fresh raspberries at our Easter brunch, and had the rest as dessert on Easter Monday. If we took a neat spoonful of chocolate paste, it looked just like an Easter egg on a handle :-)

Part of our 2020 Easter brunch, during ‘intelligent lockdown’. The chocolate eggnog paste is in the espresso cups. It wasn’t mousse, but thick like Nutella, and delicious. For Easter, we only use the yellow and green parts of our Arzberg Tric service (we have orange, ice blue, lagoon blue and dotted in mixed colors as well).

Another way to have chocolate was with my new, beloved Hot Chocolate Shaker!

Just hot water and chocolate, shaken. Delicious!

It is a simple looking plastic cup with a lid. I was doubtful at first whether this would really be anything special. But I decided to give it a try and order, because my luxury drinking chocolates never resulted in completely satisfactory drinks at home. I tried several hand whisks but my chocolate always remained watery with separate chocolate bits. An immersion blender could do better, but it is just too big for one cup.

I was pleasantly surprised by the Hot Chocolate Shaker! By putting chocolate and water in it, and shaking it manually for about ten seconds, I can make a delicious hot chocolate drink! (Of course this works with milk, too.) Cooped up at home with all my chocolate at hand, and a need for sweet comfort, this new gadget is a serious threat to my waistline!

I am usually quite moderate with chocolate, but a nice cup of hot drinking chocolate takes 30 grams or more. That adds up!

Pieces of chocolate bar (Original Beans – Femmes de Virunga – 55% dark milk chocolate) in my chocolate shaker. Just adding hot water and shaking for about 15 seconds results in a frothy, completely smooth drink. Cleaning the cup is a breeze, too!

There were other treats for our four day Easter break at home. I ordered a gorgeous book (through Quiltmania), Wartime Quilts by Annette Gero.

Wartime Quilts, book by Annette Gero. Great to enjoy with hot chocolate, in my comfy pants :-)

Peek inside the book. My favorite quilts are the geometric antique quilts made by soldiers, from thousands of pieces of thick wool uniform fabrics.

And I have some more pictures for you, continuing from my previous post.

Original quilt design by Annika Kornelis

The milk chocolate brown here represents the comfort of chocolate in yet another form! All blocks in these 3 quilt designs are original designs, and drafted by me in EQ8.

The rainbows from my starting idea transformed into wavy backgrounds here, which reminded me of comet trails. Not as hopeful as rainbows, but perhaps equally fitting for these times!

I hope you were able to make the best of Easter, or just a break, as well.

Stay home, stay safe!

XXX Annika

EQ8 Project File for Willyne Hammerstein’s Raindrops Quilt Pattern

A variation of Willyne Hammerstein’s quilt pattern Raindrops Are Falling On My Head (in the book Millefiori 4 by Quiltmania)

Inklingo’s Linda Franz just released another shape collection for a pattern from the Millefiori 4 quilt pattern book by Willyne Hammerstein. This time it’s Raindrops Are Falling On My Head. This is another one that can be drafted in EQ’s square blocks. So I did! But no digital fussy cutting this time. I wanted to get this project file to you as quickly as possible, just in case you are bored in quarantine or social isolation.

You can use my project file as a coloring page, and to audition digital fabrics. EQ8 scales fabric prints to the block size. In my project file the quilt layout and block size are different from the actual pattern!

I don’t have the pattern, so I don’t know what the block size in the pattern is. So, if you want to make this quilt, and want to use an EQ8 file for auditioning fabric prints, you need to type in the correct block size in the project file.

The pattern is in centimeters, and your EQ may be set for inches. You can change the settings to centimeters.

Go to your starting window in EQ. If you click on the little cog wheel icon (Settings icon) near the bottom left, a pop up for Preferences for your Workspace and Project properties appears. After adjusting your settings, click OK. (If you are in one of the workspaces, you will get a different pop up when clicking the Settings icon.)

After changing to centimeters a 9 inch block will be a 9 centimeter block, which is about 2.5 times smaller. So if you plan to actually make this quilt, check your units before you spend hours of rotating and fussy cutting digital fabrics at the wrong scale!

If you are just playing with fabrics for fun, you can resize the block until your chosen fabrics fit to your liking!

You can download my EQ8 project file here.

Have a home made truffle to go with it, and have fun!

XXX Annika


Merry Christmas!

Christmas Quilt Design Using Mostly Inklingo Drunkards Trail Units – original quilt design by Annika Kornelis

Merry Christmas from Rotterdam!

I wanted to put this in Applique Text in the top right of this quilt, but for some reason I could not get Applique Text to work :-( (I was on layer 2 of the Quilt Worktable in EQ, in case you are wondering).

So, I had to put a star in the top right of this quilt instead. Because I once said that every Christmas quilt should have a star, and this one did not have one yet! I picked ‘Five-Pointed Star’ from the EQ Block Libraries, because of the rings around the star. They make this star fit in nicely with the Drunkard’s Trail units.

Drunkard’s Trail (or Snail’s trail) blocks are available as Inklingo shapes in four sizes. (They are on the same page as Drunkard’s Path blocks).

So, if you like this quilt, you can make your Christmas Tree bigger or smaller. I am too lazy to calculate sizes right now.

If you want to center your tree, add more snowflakes, forego snow altogether… It’s all very easy to do that. Just sew a heap of units and arrange them as you please on a design wall or something.

Merry Christmas and Happy New Year!

XXX Annika

Drawing An Apple Core Block in EQ

Following up on yesterday’s post, Linda asked me: “Is it hard to draw apple core designs in EQ?”.

Well, it depends on your design talent of course! So for me, I do it before breakfast! ;-) But seriously, for starters, you need an apple core block. And it isn’t in EQ! :-(.

But, it is easy to draft one yourself. You can use the square block to create allover apple core design quilts, with just some extra ‘seam lines’ you can ignore.
To show you how to draw an apple core block, I made a screen recording of me drawing a 3 inch apple core.

Watch the video below if you would like to know how to do this. (There is no audio). I drafted a 6 inch Easy Draw block. Snap settings are Snap to Grid Points and Snap to Nodes of Drawing.

You have to make sure your lines will snap to the block outline. You do that by drawing a line over each block outline. Remember to do it before you start drawing with the Arc Tool!

After drafting the basic apple core, you select one segment to ‘cut in half’. Next, by copying, pasting, rotating and flipping and rotating, you add these arc segments to the apple core to create the partial apple cores to fill the square block.

I drafted a block first and used it as block outlines on my drawing board, to help you see where I was going. You can keep a picture of it next to your screen while drawing.

See how easy it is? Now you try it!
XXX Annika